Monday, June 24, 2013

Great Cupcake Ideas

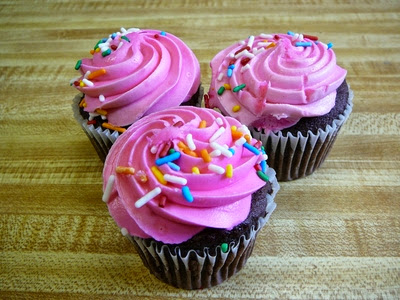
Cupcakes offer an edible canvas when decorated with icings, candies and other toppings to celebrate a theme or holiday. Basic tools for cupcake artistry include a standard muffin pan, baking cups or liners, food dye, icing bag and decorator tips, as well as cake mixes or recipes from scratch. Serving cupcakes allows convenient portion control and quick clean-up. Add this to my Recipe Box.

Bouquet Cupcakes

A cupcake bouquet brings a colorful palette reminiscent of nature. The Cupcake Ideas for You website suggests roses, carnations, chrysanthemums and other floral creations created by icing techniques. Create curious ladybird beetles from red candies marked with dark chocolate.

Garden Cupcakes

Garden cupcakes offer a visual treat with real flower petals as a garnish. Only packaged edible flowers from a grocery's produce area should top the cupcakes. A small basket or flower pot trimmed with raffia or ribbon offers a unique setting for these cupcakes.

Ice Cream Cupcakes

The Wilton cake decorating website suggests ice cream cupcakes that start with a white cake mix baked in a standard muffin pan and cooled. Add a scoop of ice cream onto the cupcake before serving. Toppings include confetti sprinkles, fudge syrup, whipped cream and a cherry.

Create a mini banana split by adding a sliced banana and crushed pineapple on a dish or plate to accompany the ice cream cupcake. For an ice cream soda cupcake, a stick candy or wafer roll inserted into the ice cream acts like a straw.

Watermelon Look-alike Cupcakes

This watermelon cupcake offers no fruit or watermelon taste, but resembles a sliced melon. A white cake mix with red food dye and mini chocolate chips are baked in a standard muffin pan. White icing, with a small portion mixed with green dye, is spread on the top. Each iced cupcake is dipped into a small plate of red colored sugar. Use an icing bag with a round decorating tip to pipe green icing around the cupcake rim to look like a green rind. Mini chocolate chips are added into the red sugar topping to resemble watermelon seeds. Use green paper liners to also suggest the green rind.

Watermelon Cupcakes

Watermelon cupcakes provide watermelon, but no cake. This fruit treat recipe may appeal to a person with wheat or gluten allergies. Use a cookie cutter or knife to cut the watermelon into rounds that fit into foil cupcake liners. Toppings can include whipped cream or non-dairy topping, plus colorful sprinkles or pieces of fruit.

Community Cupcakes

A neighborhood can inspire cupcake decorating ideas. Each cupcake could portray a detail from a home, street or garden. An icing bag with a round decorator tip can outline a colorful window, house or toy. Fashion a bird's nest from shaved chocolate and add candies as eggs. Even a street repair scene can be created from a dark icing topped with crushed candies and a yellow or white strip of icing for the median.

How to bake beach-themed cupcakes

Beach-themed cupcakes make for a delicious and fun-filled treat for your next pool party, luncheon, barbecue, kid's birthday or luau. Incorporating a tasty beach theme is both easy and economical, by using a store bought cake mix as well as a few additional items that you may already have in your kitchen cupboards. These beach themed cupcakes are an innovative alternative to a traditional dessert. Add this to my Recipe Box.

Line two cupcake tins with light blue papers. Bake the store bought mix according to the directions on the box for cupcakes and let cool.

Squeeze a few drops of yellow food coloring into the can of white frosting. Stir thoroughly until the frosting becomes a light shade of beige. Spread the frosting onto each cupcake.

Cut small 1-inch pieces of fruit roll-ups and place them on your cupcakes. Top the roll-up with a gummy bear to create a whimsical sunbather.

Place a colorful cocktail umbrella on each cupcake at a slight angle to complete your festive beach themed cupcakes.

Crazy Cupcake Ideas

It's almost impossible to go wrong with cupcakes. These single-serving cakes are becoming so popular that some people choose to use them as their wedding cakes. It follows, then, that cupcake decorating is becoming just as elaborate and outlandish as cake decorating. Cupcakes can be stacked up, made extra tall and shaped into something completely different. Add this to my Recipe Box.

Tiered Cupcake

Cakes are not the only baked goods that can be tiered. While they can't reach the staggering heights of cakes, it's possible to tier cupcakes. Start with one regular-sized cupcake and two mini ones. Cut off the tops and set aside (the bottom of the cupcakes is all that's needed. You'll also need three shortbread cookies to act as supports between the layers. Leaving the regular cupcake in its wrapper, lightly frost the top so that one of the cookies will adhere to it. Use a bit of frosting to hold the second tier onto the cookie then cover it with frosting and decorate it with sprinkles or candies. The same process is repeated to create the final tier. Once both mini cupcakes have been decorated, set the final cookie tier on top and decorate.

Soft-Serve Cupcakes

Tall cupcakes covered with fluffy white frosting look an awful lot like a big cup of ice cream. To create this type of cupcake, you need a cupcake tin with extra tall sides and the paper liners to fit inside. An alternative is to stack cupcake bottoms into a clear plastic cup with smears of icing in between each cupcake. The color icing you use is entirely optional, but should correspond with an ice cream flavor. For the top of the cupcake, use a piping bag to swirl the icing from the base to the top just like a soft-serve ice cream cone. Sprinkles and a maraschino cherry add to this as does inserting a piece of stick candy to act as a straw.

Barbecue Cupcakes

For a summer party you can make your cupcakes look like miniature barbecues. To make the shape of the barbecue you need the cupcake tops. Cover the cupcake top with red fondant and then insert three candy sticks to act as the legs. Cut out a circle of black fondant the same diameter as the cupcake top. Use a black icing color to tint some white fondant gray and roll bars for the grill. Place both of these on top of the cupcake and use a small rolled tube of red fondant to hide the edges and create a lip over the edge. Hamburgers and hot dogs are then shaped using fondant and placed on the grill to complete your miniature barbecue.

Interesting Cupcake Ideas

Cupcakes are an ideal alternative to traditional cakes at parties because you can use different flavors to suit any taste preference. Individually wrapped cupcakes are easier to serve than cakes too: they require no cutting and are made in equal portions. Frost cupcakes with tinted frosting to match your party colors, and then add some fun by incorporating interesting elements. Cupcakes can be made to fit any theme you can think of. Add this to my Recipe Box.

Cupcake Cakes

Cupcake "cakes" are easier to serve than traditional sheet cakes yet still allow the same decorating options. You can build a cupcake cake in a variety of shapes, including Christmas trees, teddy bears or even Mickey Mouse. Use coins to practice the placement of your cupcakes, and then follow the pattern with freshly baked cupcakes. Place the cupcakes close together so there are no gaps. Frost the entire shape with one solid color of frosting, and then decorate with other colors to achieve the desired look. To serve, simply pull one cupcake at a time from the pattern, and the icing will pull away with it.

Theme Cupcakes

You can decorate cupcakes individually to coordinate with your party theme. One quick and easy method is to cover each cupcake with a solid color of icing, and then top it with a cupcake topper or small trinket that represents your chosen theme. Pipe thin red frosting onto white cupcakes to look like the stitches on a baseball for your favorite Little League team. Blue-frosted cupcakes with raindrop details and tiny umbrellas are perfect for baby showers, wedding showers and spring-themed parties. Try adding different types of candies and other edible decorations to cupcakes. Add crushed cookies and gummy worms to chocolate-iced cupcakes to make "dirt" cupcakes for a child's birthday party. Crushed graham crackers, blue icing and drink umbrellas are all you need to create cupcakes for a beach party.

Ice Cream Cone Cupcakes

You can combine the taste of cupcakes with the look of ice cream cones with these fun and easy ice cream cone cupcakes. Place flat-bottom ice cream cones in a muffin tin to stabilize them. Fill the cones halfway with cake batter, and bake according to the package directions until the cakes are cooked thoroughly. Use frosting or a whipped, non-dairy topping to decorate the cupcakes after they have cooled. Swirl the frosting to look like soft-serve ice cream, and then top the "ice cream" with sprinkles and a cherry to get the full effect. Use crushed cookies, peanuts, chocolate sauce and caramel to decorate these ice cream cone cupcakes too.

Tropical Cupcake Ideas

Cupcakes were made in the United States as early as the 19th century. At that time, cupcakes were a popular substitute for cakes because they took much less time to bake in hearth ovens. Today, cupcakes are trendy and fun. While basic flavors such as chocolate and vanilla still exist, there are hundreds of flavor variations to choose from. Bring back reminders of your last beach vacation or celebrate a luau with cupcake flavors inspired by the tropics. Add this to my Recipe Box.

Citrus Cupcakes

Lemon and orange cupcakes are refreshing and light-tasting. Grate some extra rind to add to the icing for flavor, or use a peeler to scrape strings of peel for garnishing cupcake tops.

Coconut Cupcakes

Top coconut cupcakes with seven-minute frosting or cream cheese frosting. Turn cupcakes upside down and dip icing into a bowl of shredded coconut for extra flavor and an elegant garnish.

Banana Cupcakes

As versatile as banana bread, homey banana cupcakes can be made with added nuts or chocolate chips. Top with cream cheese icing and a dried banana chip for garnish.

Cocktail Cupcakes

Make margarita cupcakes and top with lime butter cream frosting and a lime wedge for garnish or opt for strawberry daiquiri cupcakes filled with fresh strawberries and topped with whipped cream icing and a strawberry slice for garnish.

Pineapple Upside-Down Cupcakes

Take a classic cake and turn it into cupcakes. Make pineapple upside-down cupcakes which don't even need icing.

Carnival Cupcake Ideas

When it comes to parties and celebrations, cupcakes are quickly surpassing cakes as the dessert of the day. Carnival-themed parties can be aimed at children or adults, with special cupcakes designed for each occasion. Turn each individual cupcake into a small piece of edible art. Skip the large cake for your party, and create small carnival delights for your guests to enjoy. Add this to my Recipe Box.

Popcorn

Bake cupcakes in vanilla or yellow cake and frost them in white frosting. Cut the bottom of mini marshmallows into an X design. This will cause the marshmallow to expand, creating a popcorn look. Place the marshmallows all over the surface of the cupcake, simulating an overflowing cup of popcorn. Spray a tiny amount of yellow food coloring over the marshmallows to look like butter topping.

Cotton Candy

Frost cupcakes in bright colors. Cut out triangles in white fondant, and place them in the center of the cupcake, with the flat side facing toward the center and the point facing the edge of the cupcake. This will be the cone for the cotton candy. Pull off a bit of commercial, bagged cotton candy and arrange it at the top of the triangle. Sprinkle a frame of colored sprinkles around the edge of the cake.

Ice Cream Cone

Pour cake batter into flat-bottomed ice cream cones. Stand the cones in muffin pans to stabilize them, and bake them according to the cupcake directions. Place white frosting in a pastry bag and pipe it onto the top of the cupcakes, piling it up to make it look like ice cream. Cover the frosting in sprinkles and place a cherry on top.

Balloons

Make white cake batter and place the batter into five individual bowls. Use food coloring to create batter in five bright colors. Bake the cupcakes as usual. Color white frosting to match each color of cake batter. Frost each cupcake with its corresponding color. Cut 18-inch lengths of ribbon. Tie the ribbons in a loose knot at one end. Lay the knot near the bottom of a serving tray and spread the loose ribbon ends out over the surface of the tray. Place a colored cupcake at the end of each ribbon to simulate a bunch of colored balloons.

Friday, June 21, 2013

Cupcake Packaging Ideas

Cupcakes make the perfect gift. They are small and delicious and can be taken anywhere. They are also easy to make. You may not be a cake decorator or especially skilled at baking, but no doubt you can bake and frost a batch of cupcakes. Wrap a cupcake in a pretty package that is easy to make to create a cute little gift. Add this to my Recipe Box.

Paper Bags

Paper bags come in all different styles, colors and sizes. They can usually be found at craft supply stores. Paper bags make good packages for cupcakes because they can be easily decorated to look however you want them to look. Use ribbon, bows, stickers, stamps, markers, glitter, paper and glue, or whatever else you can think of to turn an ordinary paper bag into a creative cupcake package.

Paper Boxes

Paper boxes can also be decorated in all different kinds of ways and with all different kinds of materials. They are sturdy, too: a cupcake is less likely to get ruined if you put it in a box. Glue a bow or a flower on the top of a plain box to turn it into a beautiful gift. Also, add a little tag with the person's name on it to make this gift more personal.

Cellophane

Cellophane is a see-through plastic material. It is often used to wrap gift baskets. The same technique can be used to wrap a cupcake. Place the cupcake in a square of cellophane. Bring the sides together to wrap around the cupcake. Secure the cellophane at the top with a rubber band. Tie a ribbon around the rubber band to add a decorative touch. Cellophane comes in many different colors.

Elmo Cupcake Ideas

If you ask a group of preschoolers the name of their favorite character, quite a few are likely to yell out, "Elmo!" This furry red resident of Sesame Street has been making children smile since his first appearance in 1979. Many birthday parties and other celebrations wouldn't be complete without Elmo cupcakes to finish the meal. Elmo's simple expression and round face give bakers a good amount of choices in decorating materials. Add this to my Recipe Box.

Face

Elmo's face is a distinctive bright red that usually can't be duplicated with all-purpose liquid food coloring drops. Purchase paste food coloring in a cake decorating store and mix it with either royal icing or fondant to create that bright crayon-red color.

Eyes

Elmo has perfectly round, googly eyes that you can duplicate in a number of ways. Pick white Necco wafers from the tube packages and add bits of black licorice for the pupils. Find small wafers of white chocolate that are designed for chocolate molding and use them with black frosting pupils. If your party guests are slightly older and you trust them not to eat the decorations, use plastic googly eyes from a craft store.

Nose

Elmo's nose is a distinctive orange blob. Place his nose slightly above the center of the cupcake, below the space between his eyes. Use round orange candies for his nose like orange gumballs, orange gum drops or orange jelly beans.

Mouth

Elmo's mouth is a large grin, usually depicted with a black outline in pictures. Use thin black licorice string to outline Elmo's grin and fill it in with either black frosting, crushed Oreo crumbs or more bits of licorice cut to fill in the space.

Curious George Cupcake Ideas

Curious George cupcakes offer a fun addition to a themed birthday party. Create your cupcakes following one design or combine several options. Choose an idea that matches your skill level. Remember to continue the Curious George theme in your display of the cupcakes. Sprinkle banana-shaped candies around the base of the cupcakes, place the cupcakes on a bed of palm leaves or surround the platter with plastic palm trees. Find a recipe for banana cupcakes to take the theme even further. Add this to my Recipe Box.

Decorative Picks

Frost the tops of your cupcakes as desired and add Curious George picks. Purchase picks through a party store. To make your own, print out small pictures of Curious George at home, cut them out and glue two back-to-back around a toothpick.

Plastic Figurines

Purchase small plastic figurines of Curious George from a toy or party store. Wash the figurines in warm, soapy water and rinse well. Frost the cupcakes with green icing or pipe leaves for the frosting. Top each cupcake with a figurine.

Frosting Faces

Print or draw a picture of Curious George's face for reference during decorating. Make or purchase chocolate and vanilla frostings. Frost each cupcake with a thin, even layer of chocolate frosting to mimic Curious George's head. Use a small spatula to spread vanilla frosting in the shape of Curious George's face. Add ears on the sides in vanilla frosting. Color a small amount of vanilla frosting with black gel food coloring. Use a piping bag with a small, round piping tip to draw Curious George's eyes, nose and smile.

Fondant Faces

JustJennRecipes.com recommends covering the tops of cupcakes with a fondant Curious George. Work from a picture of Curious George and draw a template of the face, the ears, the eyes, nose and smile. Purchase or make rolled fondant and break it into two large sections and one small section. Color one large section brown, one large section pale pink or beige and the small section black. Roll out the brown fondant and cut circles to fit the tops of the cupcakes. Roll out the pink or beige fondant and use the face and ear templates to cut out the respective pieces. Roll out the black fondant and use the remaining templates to cut the eyes, nose and smile. Use a small amount of frosting to anchor each piece in place to the brown fondant circle. Allow the fondant to air-harden for a couple of hours. Frost the cupcakes with your desired topping and cover each one with a Curious George face.

Puppy Cupcake Ideas

Create puppy cupcakes for a birthday party or as a special treat on an otherwise normal day. While adults will have to handle the baking, children can assist with the decorating as long as you don't mind a mess. Use different colors and flavors of icing to represent your favorite dog breed in a tasty, edible form. Add this to my Recipe Box.

Puppy Face Cupcakes

Wilton recommends using assorted candies and piping techniques to create cupcakes with puppy dog faces. Start by icing your cupcake with icing tinted to the desired fur color. Pipe ears onto the puppy cupcake with an open decorating tip. Begin each ear near the top of the cupcake and extend it along the side of the cupcake to leave plenty of room for the puppy's facial features. If you prefer pointed puppy ears, cut a marshmallow in half diagonally to create two triangular ears. Dip each cut portion of the marshmallow into pink decorating sugar to add detail, if desired. You can pipe on eyes and a mouth with additional icing or use round candies for the eyes. A marshmallow cut in half and pressed onto the center of the cupcake creates a muzzle and you can add a heart-shaped candy for the puppy's nose. If you wish to add a tongue to create panting puppies, cut it from a piece of soft, red taffy or a piece of fruit leather.

3-D Puppy Cupcakes

If you have a little extra time to prepare your puppy cupcakes and you want to impress the lucky recipients, try crafting three-dimensional puppy cupcakes that look like they're ready to go for a walk. Start with one standard-size cupcake to represent the puppy's body and a miniature cupcake to use as the puppy's head. Ice the tops of the standard cupcake and mini cupcake with icing of your desired fur color. Add candies and additional icing to the mini cupcake as you would to create a puppy face cupcake. Once the face is complete, assemble the 3-D puppy cupcakes by placing the mini cupcake on it's side on top of the standard cupcake. This gives the puppy cupcake the appearance of looking forward rather than straight up, which is more realistic. You can serve the cupcakes as is, or press a piece of shoelace licorice or a candy straw into the standard cupcake just behind the mini cupcake to serve as a leash.

Dachshund Cupcakes

Create the long body of a dachshund puppy by grouping together four cupcakes. You can vary the size of these miniature cakes by choosing standard size or miniature cupcakes. Cut pear shapes from your favorite rolled cookie recipe and bake them to create the dachshund's face and ears. Make extra pear-shaped cookies, as some may break; you can also cut one of the cookies in half to form two pointed tails. Cool the cookies and decorate with assorted frosting and candies, and then press them onto the cupcakes immediately after icing. The cookies will stick to the fresh frosting and become securely attached when the frosting dries and forms a light crust. Place chocolate-covered raisins or nuts at the bottom front and back of each dachshund puppy to represent feet for the finishing touch.

Bowling Cupcake Ideas

Cupcakes are becoming increasingly popular as snacks, cakes and even wedding cakes for larger parties. If you are having a bowling party for your bowling team or celebrating a bowling victory, cupcakes are an ideal choice of cake for the celebration. Bowling cupcakes are simple to make and offer many different creative cupcake decorations. Add this to my Recipe Box.

Bowling Sayings

Add common bowling sayings to the top of your cupcakes to make them relevant to the bowling theme. Sayings can include "Strike" and "Spare," but you can also include bowling lingo, such as "Turkey," "Splits," "Gutters" and "Lanes." Make each letter different colors or sizes to make the lingo cupcakes unique and make them stand out.

Bowling Pins

There are various methods for creating bowling pin cupcakes. Buy small plastic bowling pins to add to the top of the cupcake or make the bowling pins yourself using cake mix and flattened marzipan to place on the top. To create it yourself, bake bowling pins by using a bowling pin shape, such as small Popsicle forms. Once they are baked, attach them to the cupcake using frosting as glue. Place the flattened marzipan on top to cover both the added cake piece and the cupcake surface space. Dye some marzipan strips red and add two red stripes to each pin to make it realistic.

Bowling Balls

Create bowling ball cupcakes by adding colored frosting to each of the cupcakes and use black or darkened frosting to make the finger holes of the bowling ball. If you are unsure of how the holes are arranged on a bowling ball, find a picture to ensure you get the finger holes correct on the bowling ball.

Members of the Team

If you are making cupcakes for a bowling team and you know the members personally, create a cupcake face design for each of the players. Include moustaches, beards, glasses and facial features to make each player stand out. The cupcakes do not have to be professionally done, as guessing who is who is half the fun when eating them.

Wednesday, June 19, 2013

Cute Cupcake Ideas

Generally the size of a teacup, cupcakes have been around since the 19th century. Using the standard ingredients of butter, sugar, eggs, and flour, cupcakes can vary greatly due to other additions and a variety of icings. They are fun to make since there are so many ways they can be decorated. Add this to my Recipe Box.

Animal Cupcakes

Animal cupcakes are a great idea for Easter parties, specifically individual bunny and chick shapes, or a nest filled with eggs. A cupcake can also be decorated as an exotic animal, such as a lion, tiger, or hippo. Frogs can be made with googly eyes, while a bear's ears and nose can be made from chocolate.

Flowers

Six cupcakes can be combined together to make a flower shape, with the one in the middle covered with a different color icing than the others. Marshmallows can also be arranged on individual cupcakes to create a daisy shape. If each is shaped into a flower, 12 can be arranged so they create a bouquet.

Bugs

Cute bug cupcakes are an appealing dessert for children. Four cupcakes can be combined to make a butterfly, or dragonfly. Individual toppings can vary as well. Once cupcake can be made to look like a ladybug or a bumblebee, while another one can become a spider.

Cupcake Designs for Kids

Most kids don't need a reason to love cupcakes. With their individual servings and creative decorations, cupcakes are designed to delight almost anyone -- especially children. Instead of making a cake for your child's next party, consider creating a batch of fanciful cupcakes. The whimsical designs will be a hit with the younger crowd, and cleanup will be easier with no forks needed. Add this to my Recipe Box.

Spooky Spiders

Whether it's Halloween or your kid just loves creepy crawly things, a spider cupcake is sure to please. Frost cupcakes with dark chocolate frosting and cover them with chocolate sprinkles. Place two round licorice allsorts in the front for eyes. Cut eight 4-inch pieces of black shoestring licorice for legs. Bend the legs in half and stick four on each side so that they bend downward and one end touches the ground.

Popcorn

Make special cupcakes for movie night. Frost cupcakes with white icing. Snip the bottom of miniature marshmallows into an X design to make them puff up into a popcorn shape. Stick the marshmallow popcorn pieces all over the cupcakes. Dilute yellow food coloring with water and paint it on here and there to simulate butter on the popcorn. Cut red- and white-striped paper into strips and wrap each cupcake body in a striped paper strip, to look as if they were in a popcorn bag.

Worms and Dirt

For the little ones who love to dig in the yard, let them dig in their dessert. Cover chocolate cupcakes with dark chocolate icing. Crush Oreo cookies to create crumbs that look like dirt. Sprinkle the dirt all over the cupcake tops and stick gummy worms into the dirt, allowing part of the worm to hang out over the edge of the cupcake.

Ice Cream Cones

Fill flat-bottomed ice cream cones 2/3 of the way with cake batter and stand them up in muffin tins for stability. Bake them in the oven according to the directions for cupcakes. Frost your cake cones with a swirl of icing, cover them with sprinkles and finish with a cherry on top.

Fancy Cupcake Ideas

Creating fancy cupcakes is a matter of having the right tools and creative ideas. There are endless ways to create fancy cupcakes that are appropriate for any event. Using liners, icing and high-quality ingredients will allow you to make cupcakes that are delicious and beautiful. With a few pointers, you are sure to create cupcakes that are crowd pleasers. Add this to my Recipe Box.

Ganache-Dipped Cupcakes

Dipping your cupcakes in ganache is a sophisticated and simple way to dress up your cakes. Ganache consists of fine dark chocolate that you melt into heavy cream. You will use two parts chocolate to one part cream. Measurements will depend on the amount of cupcakes you plan to decorate. Once your ganache-dipped cupcakes have cooled, finish the cupcake with a small, edible flower or a few dark chocolate shavings.

Icing Flowers

Icing flowers a timeless way to decorate cupcakes for birthdays or Mother's ay. Use a pastry bag fitted with a small slanted pastry tip. Open the pastry bag, and place over a wide-mouthed cup for easy filling. Fill the pastry bag with your favorite icing recipe. Twist the top the pastry bag closed, and apply pressure on the icing. Practice creating flower designs on a plate before applying this technique to your cupcakes.

Cupcake Liners

Cupcakes liners come in an array of colors and designs perfect for any occasion. You can purchase these at any craft supply store ,or in the baking section of your local grocers. For weddings or showers choose cupcake liners with delicate lace detailing. For birthdays, use cupcake liners that match the theme of the party such as cartoon characters, balloons of favorite colors. You can find holiday cupcake liners for every holiday including Halloween, Easter, Christmas or Valentine's Day. Consider using two cupcake liners per cupcake for each cupcake for a more professional look.

Cupcake Displays

Arranging your cupcakes in a creative way can make any ordinary cupcake look extraordinary. Clear acrylic plastic display boxes layered in the formation of steps will create a sophisticated and chic display for your cupcakes. For a whimsical way to display cupcakes that will add height to your table, place them on stacked cake stands with decorative edges.

Piped Icing

Swirled icing is the quintessential way to decorate cupcakes. The technique takes some practice with a pastry bag and a open star pastry tip. Start at by outlining the top rim of your cupcake with an even circle of icing. Fill this circle with a swirl of icing. Continue this process, making each layer slightly smaller than the one before until you reach a peak.

Toppings

Personalize your cupcakes with toppings that match the theme of your event. Add color-contrasting sprinkles or edible pearls, or pipe a scripted monogram in icing for impressive cupcakes.

Tuesday, June 18, 2013

How to Apply Icing to Mini Cupcakes

Mini cupcakes are the perfect bite-size dessert to satisfy a sweet tooth. Frosting a mini cupcake can be as easy as frosting a large cupcake with the right equipment. It takes a bit more patience and a smaller pastry bag. Add this to my Recipe Box.

Icing Mini Cupcakes

Bake and cool mini cupcakes according to package directions. Prepare your frosting.

Open a resealable plastic sandwich bag and, to keep both hands free when filling, place the bag over a mug or wide-mouth jar. Cuff the bag over the edges of the jar or cup.

Hold the cup or jar with one hand and, using a spatula, fill the bag a third of the way with icing.

Gently squeeze the icing toward the bottom of the bag and direct the frosting toward one corner of the bag. Let out any excess air. Twist the ends of the bag closed to seal in the icing.

Snip off a small diagonal piece from the corner of the bag with scissors.

Position the filled bag over the outer edge of a mini cupcake. Working inward in a circular motion, gently squeeze frosting out of the bag and onto the cupcake.

Substitute for Cupcake Paper Liners

Cupcake paper liners, also known as muffin liners, are available in a variety of colors and patterns. While the paper liners help to extend the shelf life of cupcakes and by sealing in moisture and add to the presentation value by giving an attractive portable casing, they are not a requirement for making cupcakes. Add this to my Recipe Box.

Foil Liners

One problem with paper liners is that they absorb oil from the cupcakes during baking and may look greasy. This is unavoidable because some oil or fat is released when the mixture is heated. Using foil liners instead of paper liners can be used instead because the foil will not absorb oil during the baking process.

Nonstick Spray

It's not necessary to use paper liners or any liner when making cupcakes. The muffin or pan can be sprayed directly with non-stick spray or greased with butter and this will ensure that your cupcake can be removed with ease.

Silicone Cups

Another alternative to paper cupcake liners is silicone cups or molds.The cookie batter is placed directly into the silicone cups which are then placed on the baking tray. The cups are reusable and can be washed in the dishwasher.

How to Decorate White Cupcake Boxes

So you've taken the time to make a beautiful batch of homemade cupcakes to present as a gift. The easiest way to present them is in a cupcake box, which is usually a plain white box. That plain white box won't do much to impress the recipient. Make your gift stand out by decorating the box; you can decorate a cupcake box in a variety of ways. Add this to my Recipe Box.

Paint the box. If you have artistic skills, decorate the box using acrylic paint. Paint the box a bright color such as neon green or hot pink so that it will stand out. You can also draw whimsical cupcakes on the sides and paint a sign that says that you made the cupcakes. For instance, if your name is Sarah you could paint a sign on the top of the box that says, "From Sarah's Bake Shop."

Decorate with ribbon and bows. There's nothing more elegant than a simple box wrapped in colorful ribbon and a big bow. Choose a big elaborate ribbon with a matching bow. Ribbon types include satin, taffeta and organza. Select a bright-colored bow, or the favorite color of the person receiving the gift.

Draw elegant calligraphy on the box. If you are adept in the calligraphy style of writing or know someone who is, you can decorate the box using a black felt-tip permanent marker. Write the person's name in calligraphy cursive all over the box. You can also write the word cupcakes all over the box, or a list of attributes of the person receiving the gift. Don't write the words in neat little rows, write them all over the box on angles, upside down, and in funky patterns.

Tips

- Paint the box the night before you place the cupcakes in it that it will be completely dry and ready for use.

Homemade Cupcake Liners

The advantages to designing your own cupcake liners are that you can adapt them to the theme of your special occasion and save money. Aluminum foil inserts will help maintain the shape of your cupcakes and retain the design of your homemade cupcake liners. Parchment paper circles are a good option because they withstand oven temperatures. To heighten your presentation, you also can make reusable cupcake wrappers out of decorative cardstock; they are not for oven use, however. Add this to my Recipe Box.

Measure 5-inch squares of parchment paper and aluminum foil. Do not use heavy-duty aluminum foil. Stack and trim them into circle shapes with pinking shears to yield several at once with a more decorative touch.

Choose your design for your paper circles. Markers, colored pencils or stamp designs may be used, as long as your artistic tool of choice will withstand medium oven temperatures.

Center each liner over the container. Press the measuring cup over the container. Note that this technique does not yield pleats.

Push down the liners to fit tightly into the measuring cup if you want pleats. Crease the folds to make the pleats.

How to Make Spiderman Cupcakes

When you are throwing a party for someone who loves Spiderman, allow the theme to carry through all aspects of the event, including the cake. Cupcakes are a personalized, bite-size spin on a traditional cake. Give your cupcakes some personality with cute Spiderman decorations. You don't have to have a lot of baking experience to create perfect cupcakes. Add this to my Recipe Box.

Follow the instructions on a box of white cake mix to make the batter. Separate the batter equally into two bowls.

Put drops of red food coloring in the batter in one of the bowls. Stir the batter, and keep adding food coloring until you get the bright red color you desire. Repeat the process with the batter in the other bowl and blue food coloring.

Line your cupcake pan with paper cupcake liners, half red and half blue.

Fill the blue cupcake liners with red batter, and fill the red cupcake liners with blue batter. Bake the cupcakes as directed on the box of cake mix.

Frost the cupcakes with one can of white icing when they have completely cooled.

Squeeze black food coloring into the second can of white frosting. Stir the icing, and keep adding food coloring until you achieve a deep black color.

Fit a fine tip into a pastry bag, and then fill the bag with the black icing. Pipe a spider-web design onto each cupcake.

Wash and dry a package of plastic spider-web rings. Place a ring onto the top of each cupcake. The rings will look cute and serve as a party favor.

Monday, June 17, 2013

How to Shape a Police Car Out of Cupcakes

Pull-apart cakes can be made by placing shaped and decorated rolled fondant on top of a cupcake base. Party guests can serve themselves by pulling individual cupcakes from the design. Such cakes can be less messy, especially at children's parties. Making a police car out of cupcakes involves arranging cupcakes in the shape of a police car on a covered board and adding rolled fondant, icing and candy on top of the cupcakes to create police car details. A small knife can be used to score the fondant topping to make "pulling" cupcakes easier. Add this to my Recipe Box.

Building the Base

Measure a wooden board and cover it with foil. Pull-apart cakes can be heavy, so a sturdy, wooden cutting board provides the best support for the cake.

Copy a coloring book picture of a police car. Coloring books offer simple designs that are easy to decorate. Look for a side view of a police car. Use a copy machine to enlarge the picture until it fits the board. Make two copies for the cake: one to use as the police car pattern on the cutting board and the other as a guide to cut out the fondant.

Cut out one copy of the police car. Lay it on the foil and trace around the outside with the pencil.

Fill in the police car outline with cupcakes. Place a dab of frosting on the bottom of each cupcake. The frosting acts as glue to hold the cupcake to the base. Place the cupcakes as close together as possible.

Frost the cupcakes with a basic white frosting. Use plenty of frosting to hold the cake together.

Decorating the Cake Top

Cut the second copy of the car into four pieces: front, back, side and top.

Cut the police car shapes out of pre-rolled, white fondant sheets with a knife or pizza cutter. Lay the front, back and top sections of the police car on top of the fondant sheets and cut. Fondant, a mixture of almond paste, gum paste and sugar, can be made from scratch or purchased at craft stores.

Cut out the side section of the car from a sheet of black, pre-rolled fondant.

Mix a small amount of blue and black food coloring with the leftover white frosting. Mixing blue and black food coloring with white frosting makes a gray-colored frosting. Spread the gray frosting on the top part of the police car as smooth as possible. The gray frosting makes the section resemble police car windows.

Lay the shaped, rolled fondant pieces on top of the cupcake base as close together as possible. Start with the top piece, and lay it over the top portion of the cake. Lay the black center portion of the car beneath the top piece. Place the front and rear portions of car last.

Mix black food coloring with frosting and fill a pastry bag. Use a star tip and pipe tires onto the fondant cake top.

Cut the blue flashing lights out of fruit leather. Use a paper cut out of a police car light as a pattern, and place the light shapes on top of the car. Fruit Roll-Ups and Fruit by the Foot, common fruit leather brands, can be used to make the shapes.

Fill a pastry bag with white frosting and use a #1 piping tip to add details to the cake top. Do the same with a pastry bag filled with black frosting.

How to Dip Cupcakes to Frost Them

Making a cupcake can be simple but frosting one is a little tricky. The tops of the cakes can sometimes tear or crumble when frosted with a knife or a spatula. Dipping a cupcake is an easier method of getting the sweet stuff on top and it opens up frosting options. The cakes can be dipped into ganache, glaze, store-bought frosting and fondant. Melted frosting or fondant can also become a quick dip. Add this to my Recipe Box.

Ganache

Chop the semi-sweet morsels into fine bits on a cutting board.

Pour the heavy cream into a saucepan. Bring the cream to a boil on the stove top.

Remove the saucepan and set it on a trivet. Stir in the chopped chocolate morsels until they melt.

Glaze

Measure a cup of confectioner's sugar into a bowl.

Add a few drops of lemon juice.

Stir the mixture until it is smooth. Add additional drops of lemon juice if necessary.

Melt Frosting or Fondant

Spoon the frosting or fondant into a microwave-safe bowl.

Add 1 tsp of water.

Melt the frosting or fondant in the microwave for 20 seconds. Stir it and add a few additional drops of water if the mixture is thick. Microwave for an additional few minutes as needed until the frosting or fondant runs off the spoon.

Dip

Grip the bottom half of the cupcake.

Turn the cupcake upside down. Lower the top into the "dip" for two seconds.

Lift the cupcake out of the "dip" and set it right side up on wax paper. If the liner prevents the cupcake from being fully frosted, spoon the topping on the top to complete the frosting.

Tips

- Add any candies and sprinkles to the top of the cupcake before the cupcake dries.

- Ganache, glaze, melted frosting and fondant will thicken as they dry. Some cupcakes will need to be dipped twice.

How to Make Popcorn Cupcakes

Popcorn cupcakes, sweet treats that look like miniature bags of popcorn, are perfect for a children's circus or carnival party and will get plenty of laughs at a teen or adult movie party. If it's your turn to supply treats for a classroom party or bake sale, popcorn cupcakes are just the ticket. Popcorn cupcakes aren't difficult to make, consisting of a decorative "popcorn" top built on a regular cupcake base. Add this to my Recipe Box.

Bake a regular batch of cupcakes, using a cupcake pan lined with paper or aluminum cupcake liners. Although white or light-colored cupcakes are easier to cover with icing, the cupcakes can be any flavor you like. Allow the cupcakes to cool.

Frost the cupcakes with white frosting. Use homemade frosting, or simplify the process with boxed or canned frosting.

Cut an 'X' shape into the top of each miniature marshmallow, using a clean pair of scissors. Leave the bottom of the marshmallow intact. Cut enough miniature marshmallows to cover the top of each cupcake with 30 to 40 miniature marshmallows.

Press the miniature marshmallows into the frosting on the top of the cupcakes. Pile the marshmallows so the cupcake looks like a bag filled with popcorn.

Place a small amount of water in a cup. Add a few drops of yellow food coloring to create a buttery color. Use a pastry brush or a clean paintbrush to coat the miniature marshmallows with the butter-colored water.

Create bands from red construction paper, or use red and white striped gift wrapping paper. The bands should be large enough to wrap around the base of the cupcake -- about 8 inches by 1 and 1/4 inches. Alternatively, create a band on your computer, then duplicate it several times.

Wrap a paper band around the base of each cupcake, securing each band with a piece of clear tape.

How to Fill Cupcakes With Frosting

The simplest way to fill a cupcake with frosting is to slice it in half, plunk the filling inside and put the top back on. It as if the cupcake is a small layer cake. Although this method is functional, your cupcake will not retain its classic form. You can also jab the cupcake with a frosting-filled pastry bag fitted with a plastic tip. Because little space exists inside the cupcake, this method allows for only a small amount of filling. If you cut the cupcake in a specific way, you can fill it with a substantial amount of frosting without ruining its shape. Add this to my Recipe Box.

Insert a paring knife into the top of a cupcake at a 45-degree angle. Aim for a point between the edge of the cupcake and its center.

Push the knife about an inch deep into the cupcake.

Cut a circular cone out of the top of the cupcake.

Remove the cone and slice off the point, but keep the circular base of the cone. This is your plug once you have finished filling the cupcake.

Spoon the frosting into a plastic bag. Cut off a corner of the bag to form a spout. Because you are not decorating the cupcake with fine lines, a plastic bag will suffice.

Squeeze the bag into the hole to fill the cupcake with frosting. When you are done, plug the cupcake with the circular base made from the cone.

Frost the top of the cupcake.

Tips

- Make sure the cupcakes are cooled before filling them.

How to Mail Cupcakes

Making cupcakes for a birthday or special occasion is a tasty way to show people you care. You may want to share your homemade treats with friends or family that are far away, but mailing cupcakes is a risky endeavor; the most difficult part of trying to mail cupcakes is preventing the frosting from getting crushed during transport. If you want to mail cupcakes, you will need a little creativity and a lot of luck to get them there in one piece. Add this to my Recipe Box.

Simple Method

Bake your cupcakes the same day you intend to ship to preserve optimum freshness. Frost and decorate your cupcakes as usual, but keep in mind that simpler cupcakes generally travel easier.

Get an airtight food storage container with a lid that is large enough to hold the number of cupcakes you want to ship. Use a container with enough room to fit your cupcakes in one layer. Make sure the container is deep enough that the lid will not crush the top of your cupcakes when you close it.

Place your cupcakes in the plastic food storage container one at a time. This is the tricky part, because you want your cupcakes to be snug enough that they won't move, but not so snug that they are crushing each other. Many small plastic food containers fit four cupcakes perfectly, but you can easily find a container that will fit six or nine. Your cupcakes should be snug enough that if you turn the container upside down they do not fall out.

Close the lid on your plastic storage container. If you packed your cupcakes nice and snug, most of the frosting should be preserved, even with the plastic lid.

Put the plastic container in your shipping box and use crumpled up newspaper to pad the sides. Your plastic food storage container should be snug in the box, just like your cupcakes.

Ship your cupcakes and cross your fingers.

Complex Method

Get a large plastic food storage container with a lid and a thin cardboard gift box of equal size. If you cannot find a gift box of equal size, choose one that is smaller. Do not cut the gift box; the form is needed to keep your cupcakes in place. Use a thin cardboard gift box that stands up on its own and is easy to cut. Use a plastic food container that is deep enough to fit the cardboard box plus the top of your cupcake.

Using a cupcake as a guide, draw a circle on a piece of paper and cut it out. Use the guide to draw equal spaced circles on the top or bottom half or your gift box for the number of cupcakes you want to mail.

Cut the circles out of your gift box with a box cutter.

Place the gift box half in your container so that the exterior is facing up, with space under the circles for the bottoms of your cupcakes.

Put each cupcake into a separate circle, setting it securely in place without pushing. Put the lid on your food container and put the container in a shipping box.

Thursday, June 13, 2013

How to Ice Cupcakes Like a Professional

Icing cupcakes like a professional takes patience as you need to work on specific techniques to achieve a flawless finish. However, with the correct tools and practice you can succeed. Then, you will be able to use your new talent by decorating cupcakes and giving them to friends and family as distinctive gifts. Once you have mastered being able to ice cupcakes, you can create seasonal characters such as reindeer or Halloween spiders. Add this to my Recipe Box.

Unscrew the piping bag coupler into two pieces-- a plastic ring and small tube. Place the small tube inside the bag. The coupler is a plastic fitting used to swap between different piping bag tips easily.

Choose a piping bag tip and slot it through the plastic ring. The width of the ring and tip are the same, so the tip will be held by the ring. Secure the tip and plastic ring to the piping bag by screwing it onto the small tube from the outside the bag.

Put the piping bag in a tall glass, with the tip entering the glass first. Then, fold 2 inches of bag over the top rim of the glass.

Fill the bag with icing, using the spatula, then pick up the bag by gathering the folded edges upward and twisting them together. Grip the bag and squeeze it gently to push the icing down, ready for adding to the cupcakes.

Hold the cupcake on a flat surface, so that it does not move when you pipe the icing onto it. With your other hand, hold the piping bag at the top.

Create a swirl design. This is a basic professional icing technique. Hover the tip of the piping bag above the outer edge of the cupcake, Squeeze out the icing steadily, while you move the tip around the edge to make a circle. However, just before the circle is completed, move the tip inward by 1/4 inch and continue to move the tip in a circle. This creates a swirl effect with icing.

Stop piping when you reach the center of the cupcake and cannot complete another swirl. You will be left with a professional swirl of icing on the cupcake.

Practice different styles of icing. Add a grass tip to your piping bag and create the 'bathing cap' design. Starting in the middle of the cupcake, squeeze to release small tufts of icing that look like grass. Release your squeeze and repeat until the cupcake is covered.

Make a flower pattern on your cupcake. Start in the middle and, while you squeeze the icing out, make strips going to the edge of the cake. Repeat this until the whole surface is covered.

Add another layer of stripes on top of the lines created in Step 9. However, instead of piping to the edge of the cupcake, shorten the stripes so that they stop 1/4 inch from the edge. Finally, pipe a third layer. Once again, shorten the stripes by 1/4 inch for a layered effect.

Change the piping tip to a round tip, and use yellow icing. Then, add dots of icing in the center of the cupcake, to mimic the pollen of a flower.

Tips

- Experiment with different piping bags tips to create different patterns and new designs.

- Squeeze the piping bag gently, but firmly, to ensure an even, steady flow of icing. Don't squeeze too quickly or too much icing will come out.

- Wash the bags immediately after you have used them, so that they can be used again.

How to Have a Cupcake Party

Cupcakes aren't just for kids anymore. Cupcakes have become a popular trend with flavors that range from traditional, such as vanilla, to extravagant, such as red velvet. As for decorating, gone are the days of canned frosting and sprinkles. Icings come in more colors and flavors than the actual cupcakes do, making this a snack that appeals to everyone. The popularity of cupcakes makes a cupcake party a fun way to have a mom's night out, a neighborhood get together or the annual party for your book club. Does this Spark an idea?

Plan your party before sending out invitations. Consider details including how many cupcakes you want each person to bring, how they will be displayed, and if there will be a theme for the cupcakes. As the hostess, you can have first choice of cupcake flavor and you should let the guests know what you will be making.

Send out cupcake-themed invitations that provide all of the pertinent information, including the date, time, and location of the party. Invitations should also include instructions regarding the cupcakes, such as how many cupcakes each guest is asked to bring, whether or not they need to bring their own cupcake display, and info about any cupcake theme you are employing.

Provide guests a place to display their cupcakes. Whether on a tiered cupcake stand, a cupcake tower, or a flat plate, each guest should have enough room to display and show off her cupcakes.

Cut the cupcakes into halves or quarters to allow guests to sample several different cupcakes. Serve with coffee, tea and cold beverages.

Vote on the cupcakes and award prizes for different categories such as the most visually appealing, most unique flavor combination or best overall cupcake. Prizes can be small items that follow the cupcake theme, such as edible glitter, gel icing, cake jewels and toppers.

Send each guest home with a favor. Wrap uneaten cupcakes and divide them between the party guests for them to enjoy at home. Other favor ideas include fancy cupcake wrappers, icing tools, cupcake cookbooks, or cupcake decorations.

Tips

- Consider hosting your party in the mid-afternoon or in the evening to avoid interfering with mealtimes.

How to Make Professional Looking Cupcakes

While cupcakes were once limited to kids birthday parties and children's events, well-decorated cupcakes can now be found at weddings, corporate events and other formal occasions. Cupcakes are even sometimes used as centerpieces or in place of a wedding cake. Beautiful cupcakes, however, can be costly if you buy them in bulk at a patisserie or bakery. Thankfully, specialty stores often carry decorating materials that allow you to bake and create professional-looking cupcakes from your home. Add this to my Recipe Box.

Buy detailed and well-made cupcake liners for your cupcakes. These can be found in many specialty pastry stores.

Use any mix or recipe for your cupcakes, but fill your cupcake cups approximately 2/3 to ¾ full, depending on the kind of cupcake you are trying to make. Flat cupcakes should be filled about 2/3 of the way up the tin, while cupcakes with domed tops should be about ¾ full.

Buy a piping bag with exchangeable tips.

Frost your cupcakes after they cool.

Fill your piping bag with frosting. Choose a tip. Star tips can be used to make delicate rosettes around your cupcake; small writing tips will allow you to write or make small dots.

Find a piping pattern that you like on the Internet or in a magazine, and follow the instructions to create your cupcake design.

Practice your piping technique on a piece of wax paper before you begin piping onto your cupcakes.

Add sprinkles, chocolate discs, or fondant decorations on top of your cupcakes. These can all be found at a pastry store or specialty baking store.

Tips

- If may choose to bake your cupcakes without liners, then place them in your specialty liners after they have baked. Grease your cupcake cups well to prevent sticking.

Warning

- If you frost your cupcakes before they have cooled, the heat will melt your frosting.

How to Decorate Cacti Cupcakes

Theme parties can be a way to enhance the fun and enjoyment of the guests, whether the guests are children or adults. You have a chance to show your creativity and festive side when decorating for the event, and that includes the food. Decorating cacti cupcakes for a cowboy party, a Southwestern party, or just for someone who loves the South, is easy enough that even a beginner can do it. If you're uneasy about your decorating skills, practice a couple of times first so you'll feel more comfortable when decorating for the event. Add this to my Recipe Box.

Cacti Made With Frosting

Bake cupcakes according to the directions on the box and let cool completely. Frost each cupcake with a light-colored frosting. Use a color that will show good contrast with green, such as white or beige.

Make green frosting by mixing blue and yellow food coloring with white frosting. Use a couple of drops of food coloring at a time and mix until you're satisfied with the shade of green. You can always add more food coloring to alter the color.

Spoon the green frosting into a baggie. Twist the baggie closed on top and make sure all the frosting is pushed tightly down to one corner of the baggie. Hold the baggie closed with your hand.

Snip off about 1/4 inch of the corner of the baggie. Position the opening over the top of a cupcake.

Squeeze the bag gently from the top to dispense the frosting. Use your other hand to guide the direction of the frosting. Make the arms of the cactus first by making one "L" shape left of center on the cupcake, then make a reverse "L" shape right of center on the cupcake. Leave about 1/2 inch of space between the horizontal lines of the "L" shapes.

Position the frosting bag about 1/2 inch from the top of the cupcake and ensure you'll be dispensing near the center of the cupcake.

Dispense the frosting in one vertical line from the top of the cupcake to about 1/2 inch from the bottom edge. As you use frosting, twist the top of the baggie to push the frosting downward.

Make brown frosting by mixing three drops each of red, blue and yellow food coloring to about 12 oz. of white frosting. Spoon icing into a clean baggie. This frosting will be used to make needles on the cacti.

Twist the top of the baggie until all the frosting is tightly packed into one corner of the baggie. Snip off just the very tip of the corner of the baggie with scissors.

Make needles on the cacti by randomly positioning the hole in the baggie on the green frosting and dispensing a dot about 1/16 of an inch in circumference. Stop squeezing the bag.

Slowly lift the frosting bag straight up to make the point of the needle. The frosting at the tip of the opening will slightly pull out and you should have a nice, pointy needle. Repeat as many times as you wish on each cactus.

Cacti Made With Sugar Crystals

Make cupcakes according to the directions on the cake mix and let them cool completely. Frost the cupcakes with a light-colored frosting of your choosing.

Place the cactus-shaped cookie cutter in the center of the top of a cupcake. Gently push down until there is a seal between the cookie cutter and the frosting.

Spoon green sugar crystals inside the cookie cutter until you cannot see the frosting inside the cookie cutter. Tap the sides of the cupcake to ensure even distribution of the sugar crystals.

Pick up the cupcake at the bottom with one hand and place the tips of your fingers of the opposite hand very lightly on the top of the cookie cutter. Turn the cupcake upside down and gently shake to remove excess sugar crystals. Turn the cupcake right side up.

Remove the cookie cutter by grasping the sides and slowly pulling it straight up.

Tips

- To make a light-colored frosting other than white, mix food coloring into white frosting. For example, one drop of red, blue and yellow food coloring added to a can of white frosting will make the frosting beige.

- To add texture to frosting cacti, use a toothpick to make shallow lines in the frosting.

- To make the brown frosting used for needles thicker, add powdered sugar to the frosting until the frosting is a stiff consistency so the needles will stick out.

Tuesday, June 11, 2013

How to Frost Cupcakes With Sprinkles

Cupcakes are a classic treat that come in endless flavors, limited only by your imagination. Frosted and decorated, you can let your creativity take its course. Adding sprinkles to the top of a frosted cupcake will add color and whimsy. Using the proper technique to complete your cupcakes will produce a professional, colorful result you can present in any situation. Add this to my Recipe Box.

Cool the cupcakes completely. Starting with room temperature or cooler cupcakes will help the frosting adhere and spread.

Whip the frosting with a small whisk or fork until it is light and fluffy. Drop a scoop of frosting in the center of the cupcake.

Hold the cupcake in one hand and a butter knife in the other. Place the tip of the knife in the frosting and spin the cupcake to spread the frosting toward the edges. Continue spreading the frosting until it is smooth.

Turn the cupcake upside down, holding it by the base. Place the frosted top of the cupcake gently into a plate filled with sprinkles. Turn the cupcake in a circle if needed to ensure even coverage of sprinkles.

How to Decorate an Elmo Cupcake

If your child is one of the millions of kids who consider Elmo from "Sesame Street" a close friend, why not put a smile on her face by serving her an adorable Elmo cupcake? Elmo cupcakes are an easy treat for birthdays, school parties or weekday desserts, and even novice decorators can create professional-looking cupcakes. Using simple techniques and just a few basic decorating tools that you can find at your local craft store, Elmo cupcakes are the perfect way to treat the little one in your life. Add this to my Recipe Box.

Tint the chocolate frosting with a few drops of black icing coloring and blend well; continue adding more coloring until you achieve a black or very dark gray tint. Be aware that the frosting may continue to darken for about an hour after you add the food coloring.

Place the black frosting inside a pastry bag with the small round tip assembled. Draw Elmo's smiling mouth on each cupcake by outlining a semicircle and filling it in completely.

Tint the white buttercream frosting with enough no-taste red coloring to achieve the bright red color of Elmo's fur.

Place red frosting in a pastry bag with the grass tip assembled and cover each cupcake with red frosting "fur," working carefully around the mouth. Use short strokes with the pastry bag, placing the tip of the bag to the cupcake and slowly pulling upward as you squeeze out the frosting. Repeat until each cupcake is covered.

Place two white Necco wafers next to each other on each cupcake to create Elmo's eyes; dot each eyeball with a bit of black chocolate frosting from the pastry bag.

Place one orange gumdrop in the center of each cupcake to create Elmo's nose.

Tips

- In place of the Necco wafers and orange gumdrops, you can simply draw Elmo's eyes and nose onto the cupcake using plain white frosting and bright orange frosting in pastry bags.

DIY Cupcake Flowers

Cupcakes have stepped up in the world from being just a snack for children to impressive little cakes served for special occasions. Cupcakes can be decorated as simply or elaborately as you wish. Decorate all of the cupcakes with an easy vanilla frosting, or choose different flavors to jazz things up a bit. Choose the unexpected when decorating your own cupcake flowers. For example, use a chocolate cake beneath lemon-flavored or buttercream yellow icing for the sunflower cupcakes. Delicious. Add this to my Recipe Box.

Sunflower Cupcakes

Place the leaf tip on the top of a yellow icing aerosol can container. This will be the tip you use to make the petals.

Squirt the icing from the center of the cupcake to the outside of the cupcake and stop. Repeat the process next to that icing petal. Allow some of the petals to hang off of the cupcake paper just a bit. After you fill in the entire cupcake with yellow petals, then squirt another layer on top of those petals. Don't layer the petals exactly straight, however. You want the flower to look natural. Make some of the petals shorter than the others.

Sprinkle some chocolate chips in the center of the flower to complete the sunflower cupcake. The chocolate chips represent the seeds in the center of the flower.

Jellybean Flower Cupcakes

Spread white icing all over the top of the cupcake until it is smooth.

Place one round candy in the center of the cupcake. Arrange six jellybeans that are the same color around the round candy. The suggested color for the round candy is orange. The suggested color for the six jelly beans is yellow, but any color will work fine.

Place the leaf tip to the top of the green aerosol icing can. Add three, short green leaves on the cupcake around the flower.

Poppy Cupcakes

Spread white icing over the top of the cupcakes and let it dry.

Squirt three, large, light green icing leaves on top of the white icing using the leaf tip on top of the aerosol can. Place the leaves close to the edge of the cupcake. Place the flower petals on top of the icing, to layer it. You want the flower to look like it is lying on top of the leaves.

Unroll a roll of ready-to-use rolled pink fondant. Cut a circle. Using a knife, cut the circle into four equal portions.

Shape the four pieces to resemble natural poppy petals. Lay the four petals together on top of the white icing and the green leaves.

Sprinkle a few chocolate chips in the center of the poppy flower leaves to represent the center seeds of the poppy flower.

Tips

- You also can make your own frosting using premade white icing, food coloring and lemon flavoring.

Sunday, June 9, 2013

How to Look for Unique Birthday Cakes in Costa Mesa, California

Costa Mesa is a community located in Southern California between Huntington Beach and Newport Beach. There are a number of bakeries in this area that make cakes for all occasions, primarily birthdays. While most bakeries in the Costa Mesa area make birthday cakes, a few will make unique birthday cakes that no other bakery can make. You can find these bakeries easily by with a little help from this guide. Add this to my Recipe Box.

Call different cake companies in Costa Mesa, Calif., to see what types of cakes they make. A few bakeries in the area that will make unique cakes are Christopher Garren's, Cinderella Cakes and French's Cupcake Bakery (see Resources for links to their websites).

Tell the bakery what you want on your cake, how you want it designed and what type of cake you want. Listen to the different ingredients and options that these professional cake companies in Costa Mesa suggest to you.

Ask the bakery for a price quote for these unique cakes. Compare the different quotes you receive as well as what each bakery can do for you.

Tips

- Try asking nice restaurants if they will make you a special one-time birthday cake.

Friday, June 7, 2013

How to Make a Homemade Bunny Cake

Bunnies are a popular symbol for spring and Easter, so a bunny cake makes the perfect dessert for a springtime gathering of friends or family. Though your guests will be impressed with the complexity of this cake, you can actually use a boxed cake mix and two regular round pans for this adorable centerpiece. Kids too will be delighted by the looks and taste of this cake, so it would also be a perfect choice for a child's birthday celebration. Add this to my Recipe Box.

Preheat oven to 350 degrees or as called for on your cake recipe.

Mix the ingredients for your cake according to recipe or box instructions.

Pour batter into two 8- or 9-inch round pans and bake according to recipe directions. Cool completely.

Cut one of the cake layers in half across the diameter of the circle, forming two half-moon shapes. Set the other layer aside as you will only need one layer to make the bunny cake.

Stand the half-moon shapes on their cut ends next to each other on a tray covered with aluminum foil.

Spread frosting on the sides of the cake facing each other and press the halves together.

Cut a small wedge approximately 1/3 of the way up the curved end of the cake from the tray. The wedge should only be cut approximately halfway through the cake. This notch separates the head and body of the bunny.

Attach the wedge to the back of the bunny's "body" at the end furthest from the wedge to form the tail. Use frosting to attach the tail or insert a toothpick in the tail and poke it through the body for a firmer hold if desired.

Frost the entire bunny with white frosting, adding extra frosting on the sides to round out the body.

Sprinkle the entire body and head with 1 cup of shredded coconut to create "fur" for the bunny.

Press mini-marshmallows into the frosting on the tail.

Press jelly beans or chocolate chips into the head of the bunny for eyes and another jelly bean for the nose. Add licorice pieces for whiskers if desired.

Melt 1/2 cup of white chocolate chips.

Dip the cookies into the melted chocolate, using a brush to coat completely if necessary. Let the chocolate harden. You can also use a round cookie broken in half if you cannot find oblong-shaped cookies for the ears.

Press the chocolate-coated cookies into the top of the bunny's head to create ears. You can also simply cut ears out of construction paper if desired.

Mix the remaining 1/2 cup of shredded coconut with three drops of green food coloring in a plastic bag. Sprinkle around the bunny cake with a few jelly beans for decoration.

How to Make Tummy Cupcakes

When it comes to planning a fabulous event, attention to detail is what really makes your party stand out. If you are planning a baby shower, you might be thinking about how to impress your guests with a baby-themed dessert. Serving a large cake shaped like a pregnant belly has become a popular choice. You can decorate a batch of cupcakes to look like tiny tummies so each guests gets their own tasty treat celebrating the bun in the oven. Add this to my Recipe Box.

Scoop buttercream icing onto the center of each cupcake. Use about ¼ of a cup of icing per cupcake. Rather than spreading it around, leave the frosting in a lump or hill shape directly in the center. This will be the pregnant tummy. If the icing spreads or settles, it is too thin. It can be thickened by adding powdered sugar to it.

Sprinkle cornstarch on the surface where you will be working. Roll out fondant of any color until it is even and about 1/8 of an inch thick. Cut rectangles 2- by 3-inches long out of the fondant with a craft knife. Make as many rectangles as you have cupcakes, plus a few extras to compensate for mistakes. Cut off the corners to create oblong ovals instead of rectangles.

Cover each cupcake with an oval of fondant. Line up one the fondant with the edge of the cupcake on one side; let the longer end hang down over the other side. This will be the dress. Do not press down on the buttercream icing while covering the cupcakes; simply place the fondant over the top. Give the long end a bit of shape by bunching or pressing it together horizontally to lend a wavy look, like fabric on the bottom of a dress.

Reapply cornstarch to your working area. Roll out the skin-tone fondant. Use a craft knife to cut out "arms." Make these about ½ an inch by 1 1/2 inches and slightly plump. Don't worry about detail; three fingers and a thumb will look fine. If you are not confident in your fondant cutting, make a template for the arm out of paper to cut around that. Make two arms for each cupcake.

Place an arm gently on each side of every cupcake so the little arms look like they are resting on the tummy.

Tips

- Wait until the cupcakes are completely cooled before decorating.

- You can make your own buttercream icing and fondant from scratch or buy them prepared from a craft store or specialty cooking shop.

- A bright color fondant will look more like a dress and will have better contrast with the skin-tone fondant. You can also make small tick marks with a toothpick or fondant tool along the bottom edge of the "dress" to make it look more realistic.

Wednesday, June 5, 2013

How to Make Golf-Themed Cupcakes

Whether they're for a Father's Day dessert, dad's birthday party or a celebration at the country club, golf-themed cupcakes are an impressive way to honor the golfers in your life. Many amateur bakers are intimidated by the idea of creating themed cupcakes, but these treats are so simple to put together that even kids can help with the decorating. Even better, you don't need to run out and buy fancy decorating supplies or spend hours perfecting every detail of the cupcakes; you can quickly whip these up using basic tools and decorating techniques. Add this to my Recipe Box.

Frost one cupcake with a smooth layer of buttercream frosting, then dip the frosted surface into a bowl of green sanding sugar; if the tops aren't thoroughly covered in sugar, sprinkle more on top. Repeat with the remaining cupcakes.

Cut 12 3-inch strips from the ribbon, fold in half and wrap each around the top of a toothpick to create putting green flags; use double-sided tape to stick the ends of the ribbon together, then cut each flag into a triangle shape. Insert a flag into each cupcake.

Pour 1 teaspoon of sugar cookie crumbs in the center of each remaining cupcake. Use your finger to shape the surface to look like a sand trap.

Scoop out very small pieces of fondant, about 1/16 teaspoon, and roll them into tiny golf balls, pricking the surfaces with a toothpick to create dimples. Place a ball near the flag and in the sand trap on each cupcake.

Tips

- To add variety to the golf-themed cupcakes, create more cakes with different designs. Try using blue piping gel to create water hazards; or put green frosting inside a pastry bag fitted with a grass tip and encircle the putting greens with longer "grass".

Decorating Ideas for Adult Cupcakes

Ideas abound for cupcakes for children, but adults are sometimes a trickier audience. While some adults like very sweet cupcakes, many prefer something that is not overly sweet. Candy decorations work well for children's cupcakes, but might not be appropriate in a workplace environment. Designs that are beautiful, easy and tasty will appeal to many adults -- even those attending bachelor and bachelorette parties. Add this to my Recipe Box.

Black And White

Chocolate ganache is an elegant and delicious way to decorate cupcakes. Made with chocolate, heavy cream and sometimes a small amount of liqueur, ganache is also easier to make than you may think. Make two separate batches, one with dark chocolate and one with white. Melt chocolate and cream in a ratio of 2 to 1, either in your microwave or on the stove in a double boiler so you don't burn the chocolate. Do not allow it to boil. Dip the top of each cupcake in one of the ganaches. When it cools, use a spoon to drizzle the other color of ganache over the top in a decorative abstract design, such as squiggles and dots.

Swirls And Flowers

Homemade buttercream frosting, whether flavored with vanilla or another flavor that complements your cupcakes, is an easy and classy way to decorate. Combine 4 cups of powdered sugar with a stick of softened butter, then drizzle in 6 tbsp. of cream and 1 tsp. of your selected flavoring. Mix thoroughly(adding food color if desired) and load into a pastry bag fitted with a medium star-shaped decorating tip. Start in the middle of each cupcake and spiral the frosting outward to create a ridged design. Sprinkle with tiny candy flowers for a touch of delicate whimsy that isn't too sweet for adult palates.

Bachelor/Bachelorette Themes

For another take on the word "adult," consider slightly naughty cupcakes for bachelor or bachelorette parties. Erotic designs, such as certain body parts made out of marzipan or fondant, can be sculpted and mounted on top of your cupcakes with frosting. Both marzipan and fondant can be sculpted in your hands like modeling clay then allowed to dry before using as decorations. If that's too risque, consider classic symbols of eroticism such as Andy Warhol's famous prints of Marilyn Monroe or the Playboy bunny as sources of inspiration. Although they may look pretty, avoid the temptation of using marabou feathers, such as those seen on feather boas, as cupcake decorations -- they are inedible and not safe for food use.

How to Decorate Cupcakes With Sea Creatures

Cupcakes are an alternative to a cake when you are throwing a party or are celebrating someone's birthday. Bake a batch of cupcakes and decorate them with sea creatures when you are throwing a beach party or a luau. These cupcakes don't require too much skill and should be a snap for just about anyone. Add this to my Recipe Box.

Allow your cupcakes to cool completely and frost them with the icing of your choice. After you have mounded the frosting onto the cupcake, use a knife to smooth it out.

Purchase colored fondant at your grocery store or a specialty baking shop. Choose colors that coordinate well with the color of the frosting you selected.

Place a light dusting of cornstarch onto a large surface. With a rolling pin, roll the fondant out to a 1/8-inch thickness.

Press cookie cutters shaped like sea creatures into the fondant. Choose any sea creatures you like, such as starfish, octopuses, sharks, dolphins and turtles.

Remove the excess fondant and slide a spatula underneath the sea-creature shapes so that the shapes don't tear when you lift them.

Place one sea-creature shape on the top of each cupcake.

Monday, June 3, 2013

Directions for the Mickey Mouse Kitchen Timer

Available through the Disney Store and other online shopping sites, the Mickey Mouse Kitchen Timer comes in three varieties: a chrome-plated collectible piece, one with standard black ears on a red base or a "Best Of" timer with a larger, numbered base and magnetic bottom. As of January 2011, the Mickey Mouse Kitchen Timer was priced between $10 and $15. Add this to my Recipe Box.

Remove your Mickey Mouse Kitchen Timer from the packaging. Check for any damages prior to your first use.

Turn the timer by holding the base in one hand and twisting the ears to the left. Rotate the timer ears until you reach 60 (or 0).

Place the timer on a flat surface near your stove or microwave.

Allow the timer to run a 60-minute cycle before using it in an actual cooking situation. This will help ensure the timer functions and is keeping time accurately.

Set the timer by turning the timer's ears as described in Step 2. Place it on a flat surface near your cooking area. Listen for the bell to ring, which indicates the set number of minutes has expired.

Wipe off the timer with a damp cloth to remove any dirt or food spills. Do not submerge the timer in water while cleaning it.

Store your timer in a cabinet near the stove or microwave when not in use, or use it as a centerpiece or kitchen decoration.

Tips

- Check the Mickey Mouse Kitchen Timer against an accurate source if you suspect it is not keeping time properly.

- Periodically allow the timer to run a 60-minute cycle to keep it running properly or if it seems to be lagging. This can help get the timer back on track.

How to Make Cupcakes With Regular Foil as Liners

Cupcake baking often involves paper or foil pan liners which prevents the cupcakes from sticking to the pan and also cuts back on cleanup time. Many cupcake bakers have come across the problem of not having enough liners, or simply forgetting to purchase the liners altogether. When such a problem occurs and there's no time to run to the store, aluminum foil can be used as a makeshift liner. While the appearance may not be as pretty, aluminum foil can get the job done. Add this to my Recipe Box.

Cut a 5-by-5 inch piece of aluminum foil. The foil must not be any smaller than this as it will not provide sufficient coverage in the cupcake pan.

Place the sheet of foil into one of the cups in the cupcake pan. Press the foil against the bottom and sides of the cup. Smooth the foil down as much as possible.

Cut the excess foil from the top of the cup, if desired. The four corners of the foil will likely stick up above the sides of the cup.

Repeat the process for all additional cups in the cupcake pan.

Pour the batter in the cups and bake the cupcakes according to the recipe's directions.

Tips

- A 5-by-5 inch sheet of foil works for a standard cupcake size. The amount of foil will differ if using jumbo or mini cupcake pans.

Sunday, June 2, 2013

How to Put Ribbons on Cupcakes

Cupcake decoration does not have to be limited to sprinkles, frosting and candles. Decorate the outer base of your cupcakes with raffia ribbon as an accent. Select the colors of your choice for an extra detail. This type of ribbon can be added to cupcakes for any holiday or special occasion. Cupcake ribbon decoration is simple enough that children can get involved as well. Add this to my Recipe Box.

Cut 12 inches of raffia ribbon with scissors. Choose the color of your choice. You can use more than one ribbon per cupcake if you wish.

Wrap the raffia ribbon around the outer base of the cupcake where the cupcake holder is.

Tie the raffia ribbon in a knot. Do not pull too hard, or you will squish the cupcake.

Loop the raffia ribbon to form a bow, and tie it.

Trim the straight ends of the ribbon if they hang too far down from the bow.

Tips

- Other ribbon fabrics can be used, such as silk, but the raffia ribbon holds the bow shape best.

How to Decorate a Cupcake With a Cupcake Ring

Cupcake rings are often child-sized cake toppers that can be placed on top of a cupcake for a quick and easy decoration. They are similar to cupcake picks, but as an added bonus these decorations are also rings that serve as small party favors that your guests. This make them ideal for children's birthday parties. These rings usually feature cartoon characters, pictures or other designs to help you match your cupcakes to any holiday or theme. Add this to my Recipe Box.

Spread a large dollop icing over the top of your cupcake with a spatula or a butter knife. Approximately 2 tablespoons of icing should cover a standard-size cupcake.

Add any sprinkles or decorator's sugar desired to the cupcake while the icing is still soft and fresh. Most icings will harden and form a crust after a few hours and prevent these embellishments from sticking.

Place the cupcake ring on the cupcake with the hole in the ring horizontal to the top of the cupcake. You will only see the hole in the ring from the top of the cupcake when it is placed correctly.

Push the cupcake ring down gently to secure it to the icing. You can attach the cupcake ring after the icing is crusted but it will stay in place better if you apply it while the icing is fresh.

Tips

- Wait for your cupcakes to cool before you begin decorating. If you apply icing to a hot cupcake, the icing will melt and create a mess.

- Use one cupcake ring per cupcake.

Instructions for Wrapping Individual Cupcakes for Gifts

Cupcakes are easy, quick and universally well-liked. They can be elaborately decorated or nearly bare and still bring the same excitement for dessert that you had as a child. But today's cupcakes are not just for kids. There are a growing number of specialty bakeries dedicated solely to these mini-delicacies with extravagant fillings, specialty frosting and unique toppings. Whether store-bought or homemade, you can turn cupcakes into a one-of-a-kind gift. Add this to my Recipe Box.

Wrapped Cupcakes

Cut wrapping paper into strips that are approximately 1 inch higher than your cupcake liner and twice the length.

Wrap the strips of paper loosely around the cupcake's perimeter. Do not make it too tight.

Tape the paper together, forming a barrier around the cupcake.

Cut a piece of clear cellophane into a 13-by-13-inch square.

Slide the cellophane under the cupcake and wrapping paper cone.

Bring all four edges of the cellophane to the top and secure with a ribbon.

Boxed Cupcakes

Gently crumple a piece of tissue paper to fit a Chinese takeout-style box. You can use colorful or decorative tissue paper for extra pizazz.

Place the crinkled tissue paper in the bottom of the container, pressing your fingers in the middle to make a space that will fit the cupcake.

Place the cupcake carefully into the takeout box. Make sure you do not scrape any frosting off on the sides of the box. If it does not fit securely, add an additional piece of tissue paper around the perimeter of the cupcake wrapper.

Close the top of the box.

Wrap a ribbon around the box, making sure to keep it upright.

Tips

- Heavier wrapping paper works best for wrapping the cupcakes. If your paper is too flimsy, you can simply double it up.

- Make sure the cupcake's frosting has set before you begin wrapping to ensure that it will not be sticky.

A Love Bug Pattern Made With Two Cupcakes

A double-decker "love bug" cupcake makes a whimsical treat for two for Valentine's Day, anniversaries and engagement parties. Look for red and green paper cupcake cups around Christmastime, or use any solid-colored cups; paper cupcake cups printed with patterns can distract from the design. The materials needed to make the love bug can be found at craft stores in the cake decorating section and online. Add this to my Recipe Box.

Mix 1/2 of the white frosting with green gel food coloring until the desired color is achieved. Start with a toothpick dipped into a small amount of gel, and add more color gradually.

Fill a zip-top bag or icing bag with green frosting. Cut a tiny hole in the end of the zip-top bag, or attach a small round tip to the end of the icing bag. Press the tip gently on the surface of a cupcake and squeeze out a small amount of frosting. Release pressure on the bag and pull it upward, creating a "blade of grass." Repeat over the entire surface of the cupcake until it's fully covered.

Set 2 tbsp. of white frosting aside in a zip-top bag. Tint the remaining frosting red using red gel food coloring in the same way you tinted the green frosting. Use a rubber spatula to frost the remaining cupcake(s) with an even layer of red frosting. Allow the frosting to set in the refrigerator for 30 minutes to 1 hour.

Melt the melting chocolate in a zip-top bag or squeeze bottle in the microwave. Heat at 50 percent for 30 seconds at a time until the pieces melt to a frosting consistency. Put the melted chocolate into a zip-top or icing bag, and make or attach a small round tip as you did with the green frosting.

Pipe the melted chocolate on the red cupcakes to make a ladybug: Make a straight line 2/3 from one edge and fill the small section to make a head, then make a line from the middle of the first line, crosswise to the other edge. Create heart-shaped chocolate dots on each side of the line.

Cut the tip of the zip-top bag containing the white frosting. Pipe two white dots on the head section of the ladybug cupcake to make eyes. Cut shoestring licorice into 2-inch pieces and stick two into the ladybug cupcake behind the eyes to make antennae, if desired.

Place the ladybug cupcake on top of the grass cupcake to make a double-decker cupcake.

Tips

- Use green paper cupcake cups for the grass cupcakes and red cupcake cups for the ladybug cupcakes.

How to Use Food Coloring for Tie-Dye Cupcakes

Tie-dye is made by mixing different colors in an uncontrolled pattern to color an object, such as a cupcake. Each cupcake made with tie-dye icing will come out with a different pattern of colors, creating a variety of appearances. However, you cannot create tie-dye cake batter by simply mixing different food coloring in a bowl. This will result in the colors combining and forming an unappealing gray batter. If you would like to make tie-dye cupcakes, you must use special equipment to ensure the colors stay separate until you mix them together in the cupcake tin. Add this to my Recipe Box.

Mix the white cake batter per the manufacturer's instructions in a large mixing bowl.

Pour equal portions of the cake batter into three small bowls.

Add five drops of red food coloring to one bowl of batter. Stir with a spoon until the batter is an even color. Wash and dry the spoon after mixing so you do not transfer the color to the next bowl.

Add five drops of blue food coloring to the second bowl of batter and stir with the spoon as before. Wash and dry the spoon before repeating with the green food coloring in the last bowl.

Lay a pastry bag flat on a table.

Spoon an even layer of red batter into the pastry bag, using 1/3 of the mixture. The layer should be along the side of the pastry bag rather than at the bottom. This layering process will allow all three colors of batter to exit the bag at the same time.

Repeat with the blue batter, layering it on top of the red batter, and then layer the green batter on top of the blue.

Lift the pastry bag up off the table, grasping it at the top with one hand and holding the tip in your other hand.

Hold the tip over a cupcake tin and squeeze the pastry bag from the top. As the batter flows into the tin, move the tip in a circular motion until it is 3/4 of the way full. Repeat this process for each cupcake tin until the pastry bag is empty.

Wash the pastry bag and repeat the layering process twice more to fill the rest of your cupcake tins.

Bake the cupcakes per the batter manufacturer's instructions.

Tips

- You can create tie-dye icing in the same manner as the batter to top the cupcakes.