Wednesday, May 29, 2013

Ideas for Horse Cookies & Cupcakes

Hosting a themed party means paying attention to lots of details, not least of which is the menu. If you are throwing a pony party or just whipping up some sweets for a horse-lover in your life, there are many ways to incorporate a horse-theme into the treats. You don't have to be an artist or professional baker to make some tasty and adorable desserts to help you set the mood for your pony party. Add this to my Recipe Box.

Horse Cookie Cutters and Toast Press

The first idea that probably comes to mind is to use a horse-shaped cookie cutter to make a batch of cookies. Go a step further and use cookie cutters of horse-related items, too, such as riding boots, horse shoes, cowboy hats and lassos. The tool used for pressing images onto bread for toast will work on sugar cookies, too, so find one with a horse theme and make larger, square cookies; then imprint the image from the toast press into the dough.

Horse Head Candy Cupcakes

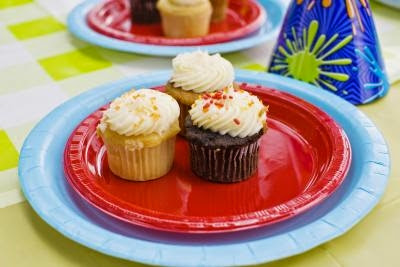
Make cupcakes look like little horses easily using fun-sized candy bars. Frost the cupcakes with chocolate icing and place a small candy bar near the edge. Use candy such as Milky Way or Three Musketeers, which have a smooth finish and are not too flat. The candy will be the horse's head. Use a toothpick to apply two tiny bits of icing on the bar for eyes and two for nostrils. Add shredded coconut for the mane. For a patch-work pony, ice the cupcake in vanilla and then add some spots of chocolate icing.

Painted Pony Cookies

Acquire a stencil with a horse theme and use this as a guide for painting cookies. Edible paint can be made from corn starch or egg yolk (only for painting unbaked cookies) or you can make "paint" from a type of icing called royal icing which is powdered sugar-based and can be applied after the cookies have cooled. Kids can help during the party by painting their own horse designs with the stencils. If you don't have stencils, you can make your own template by cutting out an image printed on card stock and painting using the outline.

Horses' Favorite Cupcakes

Instead of making treats that are shaped like horses, try making some treats that horses would like to eat. Haystack cupcakes can be tasty and simple. Ice a batch of cupcakes, leaving a little hill of icing in the center. Lay pretzels around the mound vertically---dip these in butterscotch or caramel first to look even more like hay and taste even better. You can also make "horse's favorite cupcakes" by including ingredients that horses like to eat; for instance apple cupcakes, oat cupcakes or carrot-raisin cupcakes. Top each one with either an apple slice, a sprinkle of oats or shredded carrot.

Cheap & Unique Cakes for Kids

You've certainly seen the elaborately decorated cakes in the displays at bakeries and even in supermarkets, and maybe you've considered how much your child would enjoy a fancy cake. But these cakes can be costly, especially if you have a lot of children attending a party and need a large cake. Packaged cake mixes are affordable, so you can make a cake at home and try out these unusual decorating ideas as an alternative to buying lots of icing colors, pastry bags or specially shaped cake pans.

Cake in a Bowl

After you have mixed it up, pour the cake batter into a glass bowl and bake it on a slightly lower heat for longer than the package recommends. One cake mix will usually yield two "bowl" cakes. When they're done, you will have really unusual cakes that you can make into a ball, a child's face, a globe or planet. You could leave the two halves separated and make them into sand dunes by crushing up wafer cookies for sand or into bugs with licorice antennae.

Monkey Brownies

Instead of a cake, make some brownies either from a mix or from scratch. Spread a thin layer of creamy peanut butter over the brownies. If you do this while they are still a little warm, the peanut butter will spread more thinly. Cut up a banana and place the slices all over the top of the brownies. A regular sheet cake will work for this as well, but the brownies are a little stiffer and easier to cover with peanut butter. You might already have everything you need in the cupboards for this cake.

Undecorated Sheet Cake

If you are hoping for a cheap kids' cake that you don't have to bake yourself, you'll have to search for something a little higher in price, but you don't have to go too far. The same bakeries that sell the cakes with complicated buttercream designs will often sell you a sheet cake that is undecorated for much less than one they had to decorate themselves. This way you don't have to bake the cake, and you can add inexpensive embellishments. For instance, use cookies cutters or just a knife to cut out circles and stars from a couple of fruit roll-ups in a couple of colors. Then set these on a plain white sheet cake to give it some pizzaz.

Cupcake Creations

Cupcakes can be easier to dress up than a regular cake. Since they are so small, adding just one item to each one can make them stand out. Ice cupcakes in chocolate and place one gummy worm on each one for "worms in the dirt" cupcakes. Buy a small tube of red icing gel for only a couple of dollars and ice the cupcakes in vanilla; add two red curved lines on each one to make little baseballs. Even just adding two chocolate chips for eyes and five for a little smile will make a special smiling cupcake.

How to Decorate Fancy Cupcakes

Whether you're hosting a birthday party or making cupcakes just for fun, decorations can add a fancy touch that will show everyone your creative side. There are numerous ways to decorate your cupcakes that will set them apart from the rest, and fondant, icing, edible pearls and glitter, and sprinkles are just a few ways to get started. Decorating fancy cupcakes may take some time and practice, but the results will add a fancy flair to any party. Add this to my Recipe Box.

Using the scissors, snip the end of the bag off, creating a hole just big enough for the decorating tip to poke about halfway out of the bag. Carefully insert the decorating tip into the bag, guiding it through the hole in the bag.

Add the buttercream icing to the disposable decorating bag. For colored icing, place the icing in a bowl, add a few drops of food coloring and mix thoroughly with a spatula before putting the buttercream icing into the disposable bag.

Push the icing into the bottom of the bag and securely tie the top of the bag in a knot or close the top of the bag with a rubber band or twist tie.

Holding the tip in your dominant hand, use your other hand to squeeze the icing carefully out of the bag. Hold the tip 1/4 inch above the cupcake and work in a circular motion, first applying icing around the outside of the cupcake and working your way in. Stop once the entire cupcake is covered.

Create a circle of icing in the center of the cupcake on top of the layer you just added. You want the center icing to be taller than the edges.

Allow the icing to set for 15 minutes. While the icing sets, make fondant decorations to place on top of the cupcake, if desired (pre-made fondant can be purchased at craft stores). Use a rolling pin to flatten the fondant and then use the cookie cutters to cut out shapes from the fondant. Be sure that the fondant pieces are small enough to fit on top of the cupcake.

Add sprinkles, edible pearls, edible glitter or fondant decorations to the cupcake, being sure not to ruin the spiral shape of the icing; these items may be placed strategically in a specific spot on the cupcake or sprinkled over the top, forming a random pattern. Edible pearls and glitter add a more formal-looking finish and increase the fancy look of the cupcakes. When finished decorating, store the cupcakes in a covered container.

Tuesday, May 28, 2013

Cupcake Ideas for Little Boys

Cupcakes are easy for little kids to handle and eat, so making a batch of creative cupcakes for your child's birthday or another special event can be a refreshing alternative to a larger cake. There are a variety of different flavors and decorating themes you can make to suit little boys, so incorporate your child's likes and interests into your final design. Add this to my Recipe Box.

Sports

If your child likes to watch or play sports, base your cupcake decorating scheme around this interest. For instance, decorate the tops of your cupcakes to look like sports balls, including basketballs, soccer balls, footballs and tennis balls. Another option is to set up your cupcakes in a rectangular formation to make a cupcake cake; decorate the tops of the cupcakes so that each makes up a portion of a complete image of a sports field or court. You can also make the cupcakes to look like little jerseys with a guest's name written on each one; use the colors of your child's favorite team if he has one, or make black-and-white referee jerseys.

Outer Space

For out of this world cupcakes, base your decorating theme on various elements of outer space. Make the top of each cupcake look like a different planet by using a variety of frosting colors. Or, decorate the top of each cupcake to look like an astronaut's helmet or an alien's face. Focus on outer space transportation methods by arranging the cupcakes to form a larger space shuttle or rocket ship cupcake cake, or decorate the tops of the cupcakes to look like UFOs.

Dinosaurs

Paleontologists in the making should get a kick out of dinosaur-themed cupcakes. If you've got a steady hand, hand-draw a variety of different dinosaurs or fossils onto the tops of the cupcakes. You can use dinosaur stencils or cookie cutters to cut these shapes out of items like fondant, fruit roll-ups or sugar cookie dough, or you can use small plastic dinosaur figurines to stick on the tops of the cupcakes. Or, combine the baked cupcakes to form a large dinosaur cupcake cake like a brontosaurus.

Dirt and Worms

Little boys are notorious for playing in the dirt and mud, so play off this image by making a "dirty" cupcake. Frost your cupcakes with chocolate frosting and then dip them into a bowl of crushed up chocolate cookies to act as the "dirt" on the top of the cupcake. Add gummy worms or other creepy crawly candy insects as a playful garnish for your cupcakes.

Cute Cupcake Ideas for Babies

Your baby's first birthday is a special occasion, and whether you're having a big party or just celebrating with the immediate family, you'll want to make some special cake. A large birthday cake is the traditional way to go, but if you make cupcakes the birthday child can have her own personal cake to smash and eat. This leaves the rest of the refreshments untouched while the family enjoys the innovative designs you can create on small cupcake forms. Add this to my Recipe Box.

Caterpillar

Create a caterpillar on the serving tray with a number of colorful cupcakes. Frost the cupcakes smooth and flat in a number of bright colors. Mix frosting in small bowls with different colors of food coloring to achieve a rainbow of frostings. Cut shoestring licorice into 3-inch pieces and stick two of them into the side of each cupcake. Arrange the cupcakes on the tray with the licorice sticking up on the first one for antennae, and the licorice sticking down on the rest for legs. Use gel icing in a tube to draw a face on the first cupcake.

Elmo

Make your baby's cupcakes in the shape of a recognizable friend. Frost the cupcakes in bright red icing. Slice a marshmallow in half horizontally, leaving you two marshmallow discs. Set the two discs near the top of the cupcake for Elmo's eyes, and place a dot of black gel icing on the eyes for pupils. Use an orange jelly bean for the nose, and pipe a black gel smile across the bottom of each Elmo face, or use half of an Oreo cookie for the mouth.

Ladybug

Cut a piece of shoestring licorice 2 inches long. Set the licorice across the cupcake, about 2/3 of the way toward the top. Frost the lower half of the cupcake in red and the upper half above the licorice in black or dark brown. Cut another licorice string and lay it vertically in the middle of the cupcake from the first string down to the bottom, to separate the wings of the ladybug. Add spots to the ladybug wings with black gel frosting in a tube.

Balloons

Set out a round tray for serving your cupcakes. Frost your cupcakes in colors according to your party theme, or do them in a rainbow of colors. Stick one string of shoestring licorice into the edge of each cupcake, to serve as the string on a balloon. Arrange the cupcakes on the tray in the shape of a bunch of balloons, with all the strings pointing downward and bunched together at the bottom.

Monday, May 27, 2013

Unique Cakes for Kids

Make a unique cake at home for a fraction of the cost of a store-bought cake and still impress all the birthday guests and the guest of honor. Cakes can be simple for even a novice baker and can be customized to the interests of any birthday child. Decorate a cake with a favorite doll, a beloved movie character or that one accessory no teenager can live without. Add this to my Recipe Box.

3D Doll Cake

Make a 3D doll cake, using the birthday girl's favorite character. Prepare a cake mix and bake the mix in an 8-inch round cake pan and a 6-inch round oven-safe bowl. Allow the cakes to cool and then place the 8-inch round cake on a cake tray. Spread a layer of butter cream icing on the top and sides of the cake. This is the stand for the doll. Place the cake from the oven-safe bowl on top of the 8-inch cake and spread a layer of butter cream icing on the cake. This is the doll's dress. Make a 1-inch-wide hole in the top center of the cake, wrap the doll's legs in plastic wrap and insert the doll into the cake. Use a pastry bag and star icing tip to pipe the upper portion of the dress onto the doll. Decorate the cake with candies and icing.

Cell Phone Cake

For older children and teenagers, make a cell phone cake. Bake a prepared cake mix in a 10-inch cake pan and then allow it to cool. Insert the tip of a serrated knife into the center of the cake, place the knife on an angle and hollow out some of the center of the cake so that it looks like a serving platter. Spread a layer of icing over the entire cake. Make a batch a crisped rice and marshmallow squares and spoon the "batter" while still hot into a large rectangular baking pan. Allow the tray to cool and then cut the crisped rice and marshmallows into 2-by-4-inch rectangles. Melt colored candy melts over a double boiler and dip the top of each crisped rice rectangle into the melted candy. Use chocolate-covered candies for the cell phone buttons and place each crisped rice cell phone on the cake.

Edible Image Cake

Decorate a regular slab birthday cake with the birthday boy's favorite picture. Turn a photograph, magazine cover or small poster into an edible image or purchase a premade image of a famous television or movie character. Take the image or the device on which the image is stored to a store that makes edible images; many stores can provide the completed image the same day. Wash your hands and carefully remove the edible image from its backing. Place the image on the cake and press gently to smooth the image onto the cake.

Pizza Cake

For pizza lovers, make a cake that looks like a pizza. Prepare a vanilla cake mix and divide the batter into two 10-inch cake pans. Bake according to the mix's directions and then allow the cakes to cool. Cut any rounded top off the cakes, spread a layer of icing on top of one of the cakes and place the other cake on top. Tint some vanilla icing with brown food coloring to make a light tan color and use a pastry bag and star icing tip to apply a layer of icing over the entire cake. Put the cake in the refrigerator to cool for 30 minutes and then apply a thin layer of red icing for the "sauce." Melt white chocolate over a double boiler, drizzle the chocolate over the cake for "cheese" and put the cake in the refrigerator for 30 minutes. Use dark red icing to make "pepperoni," green icing to make "green peppers" and yellow icing to make "pineapple."

How to Decorate Cupcakes for Christmas

Cupcakes: an adorable and delectable treat. Christmas and other holidays are a perfect time for cupcakes. Cupcakes can be decorated in many ways and allow for a lot of creativity. There is no wrong way to decorate a cupcake which makes it even more fun. The process of decorating can be enjoyed by people of all ages and can allow for quality time with family and friends. Add this to my Recipe Box.

Santa Claus Cupcakes

Spread a layer of white frosting on a cooled cupcake using a rubber spatula or butter knife. Allow this layer of frosting to "set" for about 15 minutes before adding the red frosting. This will prevent the frosting to mix together (this would create pink frosting). Spread a thin layer of red frosting around half of the cupcake in a moon-like shape. This should look like Santa's red stocking cap.

Dust a layer of coconut on the bottom half of the cupcake in a half-moon like shape. This will be Santa's fluffy white beard. Take a small marshmallow and place it at the tip of the red hat for the fluffy ball at the end of Santa's hat. Using black gel frosting, pipe out frosting to make Santa's eyes.

Place a small red candy in the middle of the cupcake. This will be Santa's button-red nose. Give Santa rosy cheeks by using a bit of red gel frosting and placing it in small circles on Santa's cheeks. The cupcakes are ready to serve right away and do not require any setting time.

Cooking Ideas for a Preschool Bug Theme

To get kids excited about bugs, teachers can create some tasty bug treats for them to enjoy in the classroom. Children can pretend to eat fast crawling ants when they dine on "Ants in the Kids' Pants" or "Ants On A Log." They can also enjoy mud cups and butterfly treats. Finally, to wash down their buggy meals, kids can drink bug juice. Add this to my Recipe Box.

Ants In The Kids' Pants

Cut a slices of white bread or wheat bread so that they resemble the shape of pants. Put peanut butter on top of the bread. The brown peanut butter will create the appearance of pants. With supervision, the students can use plastic butter knives to spread the peanut butter. Give each child five raisins. The raisins will be used as ants. The children can sprinkle the "ants" on top of their pants.

Ants On A Log

Before class, wash and slice stalks of celery. The celery stalk will be use as a "log" in this bug recipe. Give each child a slice of celery and allow the children to put peanut butter in the celery's grove. The peanut butter will serve as a sticky filling. For the ants, provide children with raisins or with chocolate chips. The kids can place their ants along the log, and then enjoy a tasty snack.

Dirt or Mud Cups

Since many insects can be found in the dirt, preschool students can enjoy creating their own (edible) cups of dirt. Give each student a small, clear plastic cup (the better to see the the dirt and insects). Fill the cups with chocolate pudding. The chocolate pudding will be the dirt. Either crush Oreo cookies or allow the kids to crush the Oreos to form a loose, top layer of soil. The choice of insects will be up to you. You can put in gummy worms or use raisins to represent your bugs. Your class can pretend the raisins are flies or ants. As an alternate choice, you can also put in Rice Krispies for your bugs.

Butterfly Treats

Pretzels should be arranged to resemble butterfly wings (the loop on the pretzels will give the appearance of wings). To get the wings to stick to one another, spread peanut butter over the pretzels and push down lightly. You can add chocolate chips for the butterfly's eyes, and if you wish to add an antennae, slice small pieces of licorice and press them into the peanut butter.

Time For Bug Juice

If the kids are eating tasty bug snacks, then they will also need some bug juice to drink. To create a bright green juice, mix lemonade with a blue Kool-aid drink. Serve this buggy drink with the treats prepared in the class. Not only will the students get to quench their thirst, but they'll also learn about mixing and creating new colors.

Cupcake Ideas for Kids' Birthday Parties

Cupcakes are a fun alternative to a regular birthday cake. With a little creativity and imagination, you can create fun and delicious cupcake masterpieces for your child's next birthday party. Choose a cupcake decoration that will coordinate with theme of the birthday party for a cohesive look. Add this to my Recipe Box.

Birthday Hat Cupcakes

Make cupcakes that resemble traditional cone-shaped hats that children often wear at birthday parties. Bake cupcakes in the birthday boy or girl's favorite flavor. Choose a cupcake liner that coordinates with the colors of the party. Frost the cupcakes, then place a cone-shaped sugar ice cream cone on top of the cupcake. Frost the sugar cone and cover it with sprinkles and other small decorations. You can even write "Happy Birthday" on the front of the birthday hat.

Popcorn Cupcakes

Another fun alternative for a child's birthday party is to make cupcakes that look like a bowl of popcorn. Bake your cupcakes and frost them in white icing. Take miniature marshmallows and cut them each into two or three pieces, then mash the pieces back together, using more white icing if you need to. This will make lines and wrinkles in the marshmallows so they look like pieces of popcorn. Place the marshmallows on the tops of the cupcakes and pile them up, using more frosting to help them stick. Dilute some yellow food coloring in a bit of water. Using a clean paint brush, paint the tops of the marshmallows with the yellow food coloring so they look like they are covered with butter.

Frog Cupcakes

For a child that likes animals, create cupcakes that look like frogs. Bake your cupcakes and frost them in blue icing to look like the surface of a pond. Cut a large green gumdrop in half and use that for the frog's eyes. Pipe a circular round of white frosting on the bottom of each eye, topped with a bit of black frosting to create the eyeballs.

Fondant Cupcakes

Fondant is a wonderful tool to create imaginative birthday cupcakes. Bake your cupcakes and frost them in the birthday boy or girl's favorite kind of frosting. Purchase fondant at your local grocery store or specialty baking store and roll it out to about a 1/8-inch thickness. Use a cookie cutter to cut shapes out of the fondant and place them onto the tops of the cupcakes.

Thursday, May 23, 2013

Tractor Cupcake Ideas

Many little boys (and some big boys, too) love large machines, such as dump trucks, cranes and bulldozers. However old your birthday boy is turning, he will be happy to have tractor cupcakes at his party. Because tractors are complicated vehicles, you might think it would be difficult to create one for a dessert, but there are many ways of conveying a tractor theme on your cupcakes. You don't have to be a master baker to create special tractor cupcakes. Add this to my Recipe Box.

Tractor Cutouts

The first idea to spring to your mind is probably to create a tractor on top of each cupcake. Do this by making a small tractor template on paper and tracing this onto rolled fondant. Fondant is a substance like sugary dough, which you can buy or make at home. Place one tractor on each cupcake and add junior mints for tires. You can also use a pastry bag and small icing tip to draw in details on each tractor.

Tractor Toppers

Instead of making an edible tractor on the cupcakes, you can make your own tractor cupcake picks. Buy large, round stickers of any color and long toothpicks. Cut out tractor shapes on construction paper and glue one to each sticker. Take two stickers and sandwich a toothpick in between them. You will need two dozen stickers to make one dozen toppers. Ice the cupcakes however you want before adding a pick in each one.

Tire Treads and Deer

If a tractor is too complicated to reproduce on your cupcakes, you can still make the cupcakes tractor-themed. Find a reindeer cookie cutter and use it as a stencil to make deer on some of the cupcakes, or trace the deer from the John Deere logo and use this as a stencil. On the other cupcakes, take a toy vehicle with plastic tires and roll one of the tires over the top of an iced cupcake. This will leave a tractor tread mark on the cupcake if you use a crusting icing, such as buttercream. Be sure the icing has set before driving the toy vehicle's tires on it.

Cupcake Cake

Make a cupcake cake into the shape of a tractor by arranging the cupcakes on a platter. Keep the shape as simple as you can. Try using four cupcakes for each wheel, iced black or brown, eight cupcakes for the body and four for the cab. Once the cupcakes are arranged how you want them, adhere them to the platter with a dab of icing under each one. Instead of icing the cupcakes in the appropriate colors ahead of time, you can also line them up and ice over all of them at once, but this requires a great deal of icing, so plan ahead.

Handy Manny Cupcake Ideas

Handy Manny is a cartoon about a handyman named Manny Garcia and his adventures with his talking tools. The show is quite popular with younger viewers, which may result in your needing to plan a Handy Manny birthday party for one of your young children. If you want to make Handy Manny cupcakes, there are a few ways to go about the baking process. Add this to my Recipe Box.

Cupcake Rings

Cupcake rings are small plastic toy rings that can be placed on top of cupcakes. After a child is done eating the cupcake, the ring can be rinsed off and worn for the rest of the day or week. One simple method for making Handy Manny cupcakes is to bake a batch of regular cupcakes and place one Handy Manny ring on top of each cupcake. You should be able to find the decorations at a local party supply store.

Mosaic Face

A trickier method for creating Handy Manny cupcakes is to make a batch of cupcakes and decorate them all to create one large image. To do this, find a large image of Handy Manny or one of the other main characters of the show. Bake a batch of cupcakes, then place them on a pan. Use decorative icing to make a large picture of the character, using each cupcake as a small part of the image.

Tools

Handy Manny's tools are an important part of the show. Building on the cupcake mosaic idea, create a set of cupcakes for each of Handy Manny's tools. This is best for large parties or classrooms for which several dozen cupcakes are needed. Set the cupcakes out in the shape of Handy Manny's tools and decorate each set to match the character from the show.

Fondant Tools

If you want a more advanced baking project and are comfortable using fondant, there is yet another way to make a set of interesting Handy Manny cupcakes. Bake a regular set of cupcakes and frost them with colors that match the Handy Manny show. Next, use fondant to craft small copies of each of Handy Manny's tools. Decorate each cupcake with one fondant tool for a truly unique cupcake experience.

Cute Monster Cupcake Decorating Ideas

Not all monsters have to be scary. This is especially true when they are delicious cupcakes. Decorating cupcakes is a creative activity that is growing to be a popular culinary pastime. How you decorate your cupcakes is limited only by your imagination. However, there are some monster cupcake designs that are sure to delight. Add this to my Recipe Box.

Tall Monster Cupcakes With Eyes

Take a cooled cupcake, place a small amount of frosting in the middle and place a miniature cupcake upside down on top of the frosting. Cover the entire miniature cupcake and the top of the main cupcake with frosting. Use piping bags with decorative tips to create feathered, furry or stringy effects. Take two small, round lollipops, unwrap them and slip on two gummy peach ring candies to form eye shapes. Put a dab of frosting in the middle of each lollipop to hold a small, round piece of candy for the pupil. Carefully insert the lollipops into the top of the cupcake. The result is a furry monster cupcake with googly eyes.

Caterpillar Effect

Line up one or more rows of cupcakes to create one large monster cupcake that looks like a caterpillar or perhaps a Chinese dragon. Designate one large cupcake or a couple of smaller cupcakes for the head. Decorate the head with candies or icing to give it a ferocious appearance. You can use candy corn as spikes or licorice whips as tentacles on all of the cupcakes that make up the body. You can also use small round candies as spots. Make sure your cupcakes are assembled in monster form when you present them, or they will just look like regular decorated pastries.

Octopus Monsters

Octopuses have a monstrous appearance. Cover a cupcake with icing and insert a large, round lollipop into the center. Lay gummy worms on the cupcake so that they appear to come out of the lollipop. You may have to cut the worms so that they fit or so the octopus monster looks more realistic. Put two or more small dollops of icing at the base of the lollipop. These will be the eyes. Add miniature chocolate chips to the center of the icing dots for pupils.

Marshmallow Monsters

Cover the top of a cupcake with icing. Press in three or four small marshmallows along the bottom edge. These will be the teeth. Press in one large marshmallow and one small marshmallow for the eyes. Add icing or melted chocolate for the pupils. You can also cut a piece of taffy or gummy tape into a semi-circle to make eyelids. The end result is a grinning, goofy monster.

Wednesday, May 22, 2013

How to Change the Flavor of Icing

Making or purchasing icing in large quantities is a great way to save money and ensure that you always have icing for desserts. Eventually, eating icing that is always the same flavor can get kind of boring. Starting with plain icing, you can use flavor extracts and food dye to change the flavor of your icing in a matter of minutes. Add this to my Recipe Box.

Decide what flavor of icing you want. Once you have decided, choose a flavor extract to match. Flavor extracts are readily available at most grocery stores and can be found in the baking and spice aisle. Some popular flavor extracts are vanilla, lemon, orange, mint and almond.

Place your icing in a bowl. Start flavoring by adding ½ tsp. of extract for each cup of icing. Stir the extract into the icing with a spoon. Taste to see if the flavor is to your liking. If you want a stronger flavor, continue adding extract a few drops at a time, stirring and tasting until you get the flavor you desire.

Add color to match your icing to its new flavor. If you have decided to add lemon extract to your icing, add in a few drops of yellow food dye. If you chose mint extract, a drop or two of green food dye will dye white icing a light mint green.

Use your newly flavored icing to frost cakes or cupcakes or to decorate sugar cookies. Store any unused icing in the refrigerator.

Cupcake Ideas for Christians

Whether it is Easter, Christmas, a christening or another religious event, Christians have many celebrations throughout the year. Cupcakes are a fun, festive dessert offering to have at any event and tailoring them for a Christian celebration is easy. Choose a traditional Christian symbol, such as a cross, or decorate your cupcakes specifically for your event or holiday by adding a few simple elements to the tasty cupcake flavor of your choice. Add this to my Recipe Box.

Traditional Christian Symbols

There are several symbols of Christianity that will work well as decorative elements. Purchase decorative cake toppers with crosses, doves or praying hands from a cake decorating site (see Resources). Then frost your cupcakes with the frosting of your choice and add your decorative cupcake picks or figurines. Simply place a topper onto the top of each cupcake to add a traditional Christian element.

For edible decorations, use tubes of colored icing to create your own crosses on each cupcake or purchase edible sugar decorations, including crosses, Christian fish symbols, bibles and lilies, online (see Resources).

Easter

Some common symbols of Easter are eggs, lambs, bunnies and crosses. Cover a frosted cupcake with colorful jelly beans or coat it with green-tinted shredded coconut then place a few jelly beans or small chocolate eggs on top.

Create a bunny or lamb cupcake by covering a frosted cupcake with shredded coconut and using marshmallows and candy to make a bunny's ears and face or a fluffy-looking lamb design.

Purple is the symbolic color for Lent, so try using purple icing or sprinkles on your cupcakes if you are celebrating Lent in the weeks before Easter.

Christmas

Christmas is the most widely celebrated Christian holiday and so there are a lot of options for this celebration. The traditional Christian symbols for cupcake decorations include angels, bells, candles, baby Jesus, a manger and a star. Create any of these symbols by freehand decorating your cupcakes with various colored icing or purchase cake toppers for the more intricate designs.

Another option is to make your own cake toppers out of fondant. Purchase pre-colored fondant from a craft store or decorating supply store. After rolling out the fondant, use Christmas cookie cutters to create your own edible cupcake toppers.

Christening

Christening or baptism cupcake decorations can take on a more personalized style. A special way to honor a child's christening is to create white fondant crosses and use icing to write the child's name on the cross. Place the decorated cross on a frosted cupcake.

Other cupcake ideas for a christening are to use icing to create an angelic baby face or purchase angelic baby cake toppers.

Or make a cross shape out of pure white cupcakes.

How to Convert a Cake to Cupcakes

When preparing a dessert, cupcakes are typically more convenient to serve and transport than an entire cake. You do not need special mix to make a batch of cupcakes; you can use cake mix instead. However, you cannot simply follow the same instructions as you would if you were baking a cake. Without adjusting the bake time and temperature, your cupcakes will be dry or potentially burnt. You can convert a cake to cupcakes with minor adjustments for delicious results every time. Add this to my Recipe Box.

Reduce the baking temperature by 25 degrees Fahrenheit. This prevents the cupcakes from burning or drying out when you bake them. If you already preheated the oven to a higher temperature, turn it off for 15 minutes to let it cool. After the oven is cooled, turn it back on to the lowered temperature.

Coat a cupcake pan in a thin layer of cooking spray to keep the batter from sticking. Pour the cake batter into the cupcake pan, filling each cup 1/4 inch from the top.

Bake in the oven for half of the recommended baking time. If the recommended time is 50 minutes, bake the cupcakes for 25.

Check the cupcakes when the baking time is up. Stick a toothpick into the middle of the cupcake. If it comes out clean, take them out of the oven. However, if it comes out with batter on the tip, place them back into the oven for another five minutes.

Allow the cupcakes to cool for 25 minutes before taking them out of the tin.

Tips

- A recipe for a 9-inch-round cake will yield approximately 10 cupcakes.

Tuesday, May 21, 2013

How to Convert The Baking Time of a Cake to Cupcakes

Cake mixes and recipes should not leave you feeling boxed in to always making a cake. You can turn a cake batter into many forms, including cupcakes. The secret to getting perfect cupcakes from a cake recipe is understanding exactly how to modify the cooking process for the variation in size from a full-sized cake form to a cupcake pan. Add this to my Recipe Box.

Prepare the cake batter according to the recipe directions. Line cupcake tins with paper liners. Grease and flour the tin if you do not have liners available. A traditional cake recipe will prepare just over two dozen cupcakes.

Fill each cupcake cup 3/4-full of batter. Leave 1/4 of the liner empty to allow room for the cupcake to rise and expand in the cup.

Preheat your oven to the temperature specified by the cake recipe. Check the cupcakes at 1/3 of the time required for the cake. Insert a toothpick into the center of a cupcake. A clean toothpick indicates that your cupcakes are ready. It may take as much as half the baking time specified in the cake recipe. Most cupcakes will bake within 20 minutes.

How to Decorate Cupcakes With Fondant

Fondant is a sweet, smooth substance that is used as a covering for fancy and elegant cakes. You might think that fondant should be left to professional bakers, but it is not that difficult to work with at home. Decorating cupcakes with fondant will give them a sleeker, more professional look. This is a good idea when you are using cupcakes for a party or another gathering. It is simple to make your own cupcakes that are decorated with fondant. Add this to my Recipe Box.

Fondant Covering

Bake your cupcakes and allow them to cool completely before decorating them.

Put a layer of frosting on the top of each cupcake. Although you are going to decorate the cupcakes using fondant, the frosting will help the fondant stick to the cupcake and will provide more flavor for the cupcake.

Take your pre-made fondant and roll it out to an eighth-inch thickness, using a rolling pin.

Use a knife or a small pizza wheel to cut circles out of the fondant that are exactly the same size as the tops of the cupcakes.

Place a fondant top on each of the cupcakes.

Make sure the tops are completely smooth, with no wrinkles. Add a piece of candy, a flower or another embellishment if you wish.

Fondant Decoration

Allow your cupcakes to cool completely after you have baked them.

Frost the cupcakes with a layer of your favorite frosting.

Use a rolling pin to roll out your pre-made frosting to a thickness of about an eighth of an inch.

Choose a cookie cutter that is smaller than the size of your cupcake and that coordinates with the theme of your party. For example, if you are throwing a Mexican fiesta, choose a cookie cutter shaped like a sombrero.

Press the cookie cutter into the fondant, resulting in fondant shapes. Place a shape on top of each cupcake.

Monday, May 20, 2013

Cute Breakfast Ideas That Don't Take a Long Time

Start your children's morning off right by preparing a quick and healthy breakfast with a few cute touches. A meal made just for kids makes the first meal of the day more satisfying, and children are more likely to eat something that appeals to their imaginative nature. Make these creative dishes often so your kids look forward to breakfast each day. Add this to my Recipe Box.

Heart- and Teddy Bear-Shaped Pancakes

Make blueberry or strawberry pancakes, and use heart- and teddy bear-shaped cookie cutters to create shapes. Pile the pancakes on the plate, and sprinkle additional treats like powdered sugar and raspberries on top. You can also add syrup or butter, depending on your child's preferences. For added cuteness, place small chocolate chips on the bear's face to make eyes and a mouth.

Bagel Critters

Create bagel critters for your children to enjoy before heading off to school. This quick breakfast involves toasting a bagel and slathering the toasted portion with cream cheese. The kids can use toppings such as olives, carrot slices, sliced strawberries, crunchy Chinese noodles, cherry tomatoes and cucumber slices to make a funny face.

Strawberry Pancake Smiley Face

Prepare blueberry or strawberry pancakes, and cut up pieces of whole strawberries. Give your kids a plate with one or more pancakes, and help them make smiley faces using whipped cream and strawberries. They can use large berries for the eyes and nose and make a smile with the whipped cream.

UFO Bagels

Make miniature UFO bagels for your children in the morning. This quick breakfast involves cutting bagels in half. You can toast the bagel or leave it plain, depending on your child's preferences. Slather the cut portion of the bagel with cream cheese, and then place sliced bananas or carrots on top of the cream cheese. Lastly, put a hard boiled egg in the center of the bagel to simulate a small UFO.

How to Cut Cupcake Liners

Cupcake liners are often the only thing standing between you and delicious, freshly baked muffins or cupcakes. When you've got all the ingredients on hand but forgot the liners at the store, you can make them on your own using parchment paper. Homemade cupcake liners are also worth the extra effort if you'll be serving your baked goods to guests since they look so striking compared to plain store-bought ones. White parchment liners look elegant and refined while unbleached parchment liners have an organic, rustic feel to them. Add this to my Recipe Box.

Cover your work surface with newspaper or brown paper bags to prevent damage. Unroll the parchment paper and lay it flat over the newspaper. Weigh the edges down with a few items to prevent them from curling.

Lay the yardstick across the top of the parchment paper. Make a small mark with a pencil every 5 inches. For mini cupcake liners, make a mark every 2 1/2 inches.

Turn the yardstick and line it up with your first pencil mark, so that it serves as a straight edge for cutting. Hold the yardstick firmly in place and then cut into 5-inch strips using a freshly sharpened kitchen knife or box cutter.

Mark one strip of paper every 5 inches (or 2 1/2 inches for mini cupcakes) using the yardstick. Stack the strips of paper with the pencil-marked strip on top. Once again, use the yardstick as a straight edge and cut at each pencil-marked increment. Cut directly through each strip of paper to create uniform cupcake liners quickly.

Coat the muffin tin with cooking spray before inserting the liners to help the parchment paper stick in place. To make the liners stay flat in the tin, place a snugly fitting glass into the muffin tin and give it a twist.

How to Display Cupcake Pops

Cupcake pops are small, miniature cupcakes that are frosted and placed onto long sticks. You can get all sorts of cupcake pops, from traditional chocolate to cupcake pops with intricate decorations. While cupcakes pops can give a party, baby shower or even a wedding a unique twist, choosing a way to display them can be challenging. Come up with an easy way to display the cupcake pops so that they look attractive and it is easy for people to take one from the display and munch on it. Add this to my Recipe Box.

Choose a variety of vases in different sizes, shapes and heights. Choose vases in a color that coordinate with the party or the event you are planning.

Take florist foam and cut it into chunks that are small enough to fit inside the vases.

Place the florist foam inside the vases. If the vases are tall, place something else inside the vase that the foam can sit on, such as a glass, so that the florist foam sits about an inch beneath the lip of the vase. That way, you don't have to fill the entire vase with florist foam.

Cover the florist foam with shredded paper, like the kind you can find to put in Easter baskets. Choose shredded paper in a color that coordinates with the vases and the other party decorations. Make sure that the shredded paper completely covers the florist foam so that it is not visible.

Take your cupcake pops and press the sticks into the florist foam. Cluster the cupcakes close together, but make sure they do not touch each other so as not to disturb the frosting.

Continue placing the cupcake pops inside the vases until all of them are filled.

Place the vases filled with the cupcake pops on the centers of tables or on the food display table. Choose some tall vases, some short, some wide and some narrow for each arrangement so that they look attractive.

Cheetah Cupcake Ideas

If it's cupcake time, the possibilities for how to decorate them are practically endless. Whether they are for a slumber party, just because or for a birthday for a kid of any age, cupcakes are yummy fun. One way to make them even more delightful is decorating them in an unusual way. For example, cheetah cupcakes are sure to impress. Add this to my Recipe Box.

Marvelous Minis

Use cheetahs as cupcake toppers. You can do this in several ways. Look on line for little plastic cheetahs to perch on the cupcakes. Add some grass or trees for variety, if you like. Or create an edible treat by lifelike by making little cheetahs out of fondant. An easier option to print out little color pictures of a cheetah or little drawings of a cheetah's face, glue them onto toothpicks, and insert it into dollop of icing atop the cupcakes.

Hue Review

Use the animal's colorings on the cupcake. Cheetahs have very distinctive black spots on a beige-orange-yellow hide. Recreate this pattern by frosting cupcakes with lemon icing, then piping on small black circles. Or, drop food coloring into vanilla icing to make it the right color, frost cupcakes, and dot with black sprinkles. Or, bake cupcakes in spotted cheetah cupcake wrappers, or just find small cheetah-print plates at a party supply store and serve cupcakes on them.

Photo Finish

Nowadays, most bakeries and even grocery store bakeries are able to personalize cakes and cupcakes with any picture you bring in for them to use. Provide them with a picture of an actual cheetah, or a clip art picture, or just an example of cheetah print, and have the image put on your cupcakes. This option costs a bit more, but the quality work and impressive look of the cupcakes will be well worth the expense.

Ship Shape

Make 3-D cheetah cupcakes. With a little know-how and a lot of creativity, you can shape cakes to look like almost anything you like, from bicycles to bears and planes to penguins. Look in cookbooks or on line for a "how to make a cat-shaped birthday cake" guide, and simply recreate on a smaller scale. And when decorating, use the distinctive cheetah colorings and facial and tail markings to give the cheetah its identity.

Types of Fillings & Toppings for Cupcakes

Baking yields many sweet pastries and goods, and quality cooks like to experiment with recipes and ingredients. Cupcakes are pretty standard as long as you have a cupcake pan to bake with and some cake mix. However, the toppings and fillings are completely up to the baker, and with so many ways to customize the traditional cupcake, taste buds never have to fear a boring dessert again. Add this to my Recipe Box.

Fruit Fillings

Fruit preserves and jellies create sweet fillings for cupcakes. From strawberries to apricots, options for fruit fillings are endless if you want to mix a few fruits together inside a cupcake. When filling a cupcake with fruit, start by pouring only half of the cake mix into the cupcake pan, then make an indent in each cup of batter for the fruit filling. Once you fill with a 1/2 tsp. of fruit filling, cover with the remaining cupcake mix and bake.

Cream Fillings

Cream-filled cupcakes attract sweet, tart and cheese lovers. With rich, creamy centers, filling cupcakes requires a small pastry tip and an icing bag. Cream cheese filling goes well with carrot cupcakes or pumpkin cupcakes. Chocolate mousse or plain milk chocolate create a fluffy, light center.

Sprinkles and Shavings

Every holiday presents an opportunity to decorate cupcakes with colorful and festive sprinkles. Beyond funny shapes, sprinkles also have several varieties, like confetti, nonpareils or sparkles. Some are circular while others are thin and long. Extra-fine sugar sprinkles take on a crystalline look when topped on a cupcake. Like sprinkles, shavings are just as delicate. Chocolate shavings often top a heath or coffee-flavored cupcake.

Nutty Toppings

Muffins and cupcakes are very similar, and when you add nut toppings, the only difference resides in the best part of a cupcake: the icing. Red velvet cupcake recipes often call for a topping of walnuts to finish off a delicious crimson-colored fluffy cupcake. Crushed or pieced nut toppings go well with other cupcake varieties, too, such as banana cream cupcakes or chocolate cupcakes with hazelnuts.

How to Color Cake Batter With Food Coloring Gel

Liquid food coloring can be used to dye cake batter for a pretty effect that is visible when the cake is sliced and served. White cake mix works best with food coloring, allowing the colorant itself to shine through. The same food coloring can be used to dye a can of white icing for a matching look. Mix more than one shade of food coloring to create custom colors for your desserts. Add this to my Recipe Box.

Prepare cake mix according to package directions up to the point where it tells you to pour the mixture into the pan. Leave the batter in the glass mixing bowl instead.

Open the bottle of food coloring and carefully begin to squeeze out drops. Apply very little pressure to the bottle and work slowly, counting each drop as it falls. Stop at 10 drops, and stir the cake batter thoroughly. Continue adding drops if you want more color in intervals of 10. Stop after each interval to stir and check the color.

Pour the dyed cake batter into the pan and bake according to package directions. Wipe down the bottle of food coloring, secure the lid, and put it away.

The Best Cupcake Liners

Cupcake liners are useful baking tools that assist in the cleanup process of baking. Even though they appear simple in their function and looks, they offer many baking benefits. Primarily, cupcake liners keep cupcakes from sticking to the bottom of a baking tray or pan. Not only do the liners save time and the trouble of scrubbing the pans, they also make serving easy. They are also pleasing to the eye, with different colors, designs and shapes. When cupcakes are placed into boxes, the liners will prevent damage to the cupcake. The cupcake's occasion and the preference of the baker will determine what cupcake liner might be considered the best. Add this to my Recipe Box.

Paper Cupcake Liners

Paper cupcake liners are considered the best standard liners. These liners come in a wide assortment of forms, colors and designs. Many people use paper cupcake liners for basic school or home uses because they are the most inexpensive liner. They generally come in a round form, but it is possible to find them in heart or star shapes in select stores.

Foiled Cupcake Liners

A foiled cupcake liner is a glossy and shiny alternative to a paper liner. This liner is often preferred because of the designs that are available. Silver and golden foils are very elegant and complementary to more elegant cupcakes. Foiled liners are also less sticky in comparison to paper liners and are less prone to greasiness.

Silicon Cupcake Liner

Silicon cupcake liners are considered the best liner because they can be washed after each use and reused again. They are very durable and resistant to high heat temperatures.

Grease Resistant Cupcake Liners

The secret to keeping cupcakes from getting greasy when they are baking is to buy a grease-resistant cupcake liner. Many bakers prefer this type of liner because they do not create a greasy mess in the pan or on the cupcake.

Sunday, May 19, 2013

How to Make Frosting Stand on Cupcakes

Cupcakes are convenient, simple to make and suitable for various occasions. Cupcakes made at home, however, often look flat and uninspired. The best way to make icing stand on the top of cupcakes for a professional look is to thicken the icing before placing it on the cupcake and to use a pastry bag to apply the icing. This will make a 3-D top for the cupcake that looks professional and delicious. Applying the icing in this manner is simple and only takes a few more minutes than applying the frosting with a knife. Add this to my Recipe Box.

Add about ¼ cup of powdered sugar to each cup of buttercream icing to stiffen it and make it better able to hold a 3-D shape. Mix the sugar into the icing until just mixed. Over-mixing can make the icing too runny. You can add paste coloring to the icing at this point as well.

Place the desired decorator tip inside the bottom of the pastry bag. Larger tips work best with cupcakes. Hold the pastry bag in your left hand. Fold the top of the bag over your hand. This will avoid some of the mess during the icing transfer. Scoop the icing into the bag with your other hand. Pull the folded portion of the bag up over the icing and twist the top of the bag several times to seal the icing in place. Squeeze the bag to bring the icing to the tip.

Apply the icing to the top of the cupcake. Start at the cupcake's edges and work your way toward the center. Build up a spiral edge, so that the middle of the cupcake is the highest point of the cake in a 3-D design. Place the cupcake on a cupcake stand to allow the frosting to harden slightly.

How to Make Cupcakes That Look Like Dogs

Cupcakes can be decorated in a variety of designs, from animals to flowers. A cupcake is easy to hold and serve, regardless of the guests' ages. If your little one wants a dog-themed birthday party, creating a cupcake that looks like a puppy is not as daunting as you might think. You can make the cupcakes ahead of the party and decorate the cupcakes the night before. The party will be less chaotic as a result --- without the worry of a sharp knife and curious fingers. Add this to my Recipe Box.

Spread a generous amount chocolate icing over the top of the cupcake using a knife. Apply the icing as close to the paper lining as possible. Insert one miniature marshmallow into the chocolate icing, slightly lower than the center of the cupcake; this will serve as the dog's nose. Add the other two miniature marshmallows to the chocolate icing, below the marshmallow nose --- the other two marshmallows will serve as the dog's mouth --- to create a triangle. Cover the marshmallows in a generous layer of chocolate icing.

Cut a miniature marshmallow in half length-wise, creating two circles. The two marshmallows will serve as the dog's eyes. Add the halved miniature marshmallows to the cupcake, above the nose. Use chocolate icing to pipe two small dots to the whites of the eyes to create pupils. Alternatively, you can use two small candies on the marshmallows to create the pupils. Secure the candies in place using a small amount of icing.

Add a brown candy-coated chocolate to the "nose" of the dog (the top of the triangle covered in chocolate frosting.) Break the chocolate wafer cookie in half, creating two similar shaped "ears." Add the ears to the outer edge of the cupcake, one cookie on either side of the eyes. Apply a pink candy-coated chocolate below the dog's mouth to create a tongue. Alternatively, you can pipe red frosting or use a pink candy chew instead.

Tips

- To create a white dog, use white icing. Pipe around the dog's eyes in a darker color or else the eyes won't show be visible.

Saturday, May 18, 2013

How to Put Fondant on Cupcakes

Adding fondant is a great way to decorate cakes and cupcakes. It leaves a smooth and solid-colored surface that is perfect for decorating. Like covering a cake with fondant, covering cupcakes requires some measuring and precision. Once you've gotten the hang of it you'll be covering cupcakes with fondant just like the pros. Add this to my Recipe Box.

Remove the cupcakes from their baking cups. Measure both the sides and the top of your cupcake. Add these numbers together to find the diameter you will need to cover the cupcake. The standard cupcake will be 2 inches wide at the top, with sides that are each 1 1/2 inches high. This means the diameter need is 5 inches.

Flip cupcakes over. It is easier to cover the cupcake from the bottom side up. Frost every side of the cupcake with buttercream frosting and smooth out any imperfections with a frosting knife. Imperfections on the surface of the cupcake will show in the fondant, so be very meticulous.

Roll out fondant so it is 1/8 inch thick and is a little larger than the diameter width you calculated previously.

Lay the fondant over the cupcake and gently press down over the top and sides. Use the spatula to trim off any extra fondant that hangs over.

Gently smooth out the fondant with the pads of your fingers until the fondant is secure and there are no bubbles left.

Friday, May 17, 2013

How to Pipe a Swirl on Cupcakes

A swirled icing top is a signature of the cupcake and can be done by the average cupcake decorator. A professional baker may be able to pipe the icing into a beautiful and delectable swirl with only one motion, however if you are a beginner it is recommended that you start with a three-step process. The process will increase your success rate and make your cupcakes look as good as the professionally decorated ones. Add this to my Recipe Box.

Place the piping tip in the bottom of the piping bag and fill the bag with icing. Twist the bag at the top and hold it with your non-dominant hand. Place your dominant hand at the piping tip.

Hold the piping tip slightly above the cupcake at its center and, while gently squeezing the bag from the top with your non-dominant hand, rotate the tip away and counter-clockwise from the center. Do this until the icing covers the top of the cupcake. You will be left with a flat swirl.

Pipe the icing on the second tier by starting just above the center of the first tier and moving outward and counter-clockwise. Do not frost all the way to the edge of the first tier.

Place the third and final tier above the second one by piping out from the center and counter-clockwise. Do not pipe to the edge of the second tier. You will be left with a swirl that appears to be done in one motion.

How to Grease a Bread Pan

When cooking in a bread pan, it is usually necessary to grease the pan. Greasing a bread pan prevents the item you are cooking from sticking to the bottom and sides of the pan, which can destroy the shape of your baked item. It can also make clean up easier and helps the item slip out of the pan without tearing or breaking. There are a couple of ways you can grease your bread pan before pouring your recipe inside. Add this to my Recipe Box.

Cooking Spray

Spray your bread pan with cooking spray to reduce the amount of fat you use.

Hold the can of cooking spray approximately 6 inches to 8 inches away from your bread pan.

Spray in a single layer using a back and forth motion until the inside of the bread pan is covered lightly with the spray.

Using Grease

Apply a few teaspoons of cooking oil, butter or shortening on the inside of the bread pan.

Spread the grease evenly using your fingers or with a folded paper towel.

Remove any clumps of grease from the pan with your fingers to prevent the food from becoming greasy when cooking.

Dust the pan with flour by putting about 1 tsp. of flour in the pan. Shake the flour around to completely coat the pan. Turn the pan upside down and tap out any loose, leftover flour. Be sure the pan is evenly coated with flour. Place your bread dough or item you are cooking into the pan and bake.

How to Make a Frosting Bag

Frosting a cake or cupcake can be a simple process involving a knife and a single color of frosting. However, if you prefer a more elegant cake or a design with more details, you can use a frosting bag. Use frosting tips with your bag to create interesting outlines and shapes. Some tips create a circular line, while others create a ruffled, slanted or triangular line. Add this to my Recipe Box.

Prepare icing according to your favorite recipe or open a can of store-bought icing. If the icing has been in the refrigerator, leave it on the counter for 10 to 15 minutes to make it softer. If you must make icing quickly, mix powdered sugar and butter or margarine. You should use about four times as much sugar as margarine.

Add food coloring to the frosting, if desired. Add and mix dye before transferring the frosting into the plastic bag.

Open the plastic bag you wish to use for icing. Slide a decoration tip into the bottom corner of the bag. Push the tip into the corner until it punctures the bag slightly. You can also cut a small hole in the bag if it does not puncture easily.

Scoop the icing into the bag. Try to place the icing in the bottom corner of the plastic bag, close to the tip. Since icing sticks to the bag, this may not be possible.

Seal the plastic bag, if possible. Place your hands along the top edge of the bag and push down, gently. Push the icing towards the bottom of the bag until it is about to move through the tip.

Ice the cake or pastry by pressing on the thick part of the icing bag. Create shapes, words or outlines.

Thursday, May 16, 2013

How to Decorate a Popcorn Cake

Theme birthday parties are popular for both children and adults. One of the most important elements is to have a birthday cake that matches the party theme. If you've decided to throw a movie premier party or circus party, create a birthday cake that looks like a giant tub of popcorn. This tasty treat will tie-in with the rest of your party decorations. While a popcorn cake looks very complicated to construct, it can be finished by older school children and other novice cake decorators. Add this to my Recipe Box.

Mix up a batch of cake batter according to the package directions. Divide the batter between the two halves of a giant cupcake pan. Bake the cake layers according to the package directions. Remove the cake from the oven and allow it to cool.

Center the bottom layer of cake in the middle of a serving plate. Frost the top of this layer with a 1/4 inch coating of the frosting. Center the top layer of the cake on top of this frosting.

Frost the entire outside of the cake with white frosting. Make the surface of the frosting smooth without any extra swirls or stripes.

Cut 3 1/3-inch strips of red fruit rollup. Slice the strips in half lengthwise to create thin red stripes. Press the fruit stripes onto the surface of the bottom layer, creating vertical stripes all around the bottom. This makes the bottom of the cake look like a popcorn tub.

Pile mini marshmallows onto the top of the cake, pressing them gently into the frosting. Place the marshmallows in random order, making them look piled up. Make sure the entire top of the cake is covered in piles of marshmallows.

Place about one inch of water in the bottom of a clean spray bottle. Drop in yellow food coloring, shaking the bottle between drops, until you have a bright yellow color. Replace the spray top on the bottle.

Spray yellow-tinted water in random spots all over the marshmallows. This colors the surface of the marshmallows and makes them look like popcorn with butter coating.

Tips

- Spray the yellow coloring very lightly, so you don't make the marshmallows soggy.

Types of Cupcakes

The days when cupcakes were cooked and slapped with icing are long gone. People are becoming more creative with many different styles and designs. What once was a simple homemade treat has turned into an artistic hobby for many. Whether you're making petite size cupcakes or one gigantic cupcake, the possibilities are limitless. Add this to my Recipe Box.

Standard Cupcakes

The standard cupcake is the one that is used most often. These cupcakes can be decorated in a variety of ways and made into unique designs. Standard cupcakes can be transformed into any character's face, animal or object. They are most commonly used at special occasions and birthdays. The latest trend for the standard cupcake is to make a pull apart cake. Bakers put cupcakes together to make a design. Once the design is set they decorate as if it were a whole cake.

Miniature Cupcakes

Miniature cupcakes are mini replicas of the standard size with bite size flavor. These cupcake can be made in any type of cake you choose and decorated just the same. The hardest challenge to overcome with these cupcakes is decorating. The space on top of a miniature cupcake is limited so the design must be accurately placed and done precisely. Miniature cupcakes can be used for any occasion, but are preferred by some moms for their kids because of their small size.

Large Cupcakes

Large cupcakes weren't a big hit up until recently. Now many people are creating a large size cupcake big enough to feed everyone at their party. A large cupcake comes with two pans -- one for the bottom part of the cupcake and the other for the top. The cake batter is divided between these two pans and baked simultaneously. Once they are cooled the top of the cupcake is placed on the bottom half to form a big cupcake. Large cupcakes are easier to decorate because there is more room.

Shaped Cupcakes

Cupcakes are no longer limited to the traditional cupcake tin. There are many pans that allow bakers to make a variety of different shaped cupcakes. Some common molds that are used are ice cream cones and holiday-themed pans. These cupcake pans make it easier to decorate since the shapes are already there.

Fifties Themed Cake Ideas

Poodle skirts, record players and soda shops help recreate the scenery for a 1950s party. If you plan to celebrate a birthday or other momentous occasion, consider using a retro '50s theme for some added fun. To properly celebrate the event, decorate a cake to look like a popular item found in the 1950s. From swinging skirts to classic cars, you can design an original cake that looks like it was brought from the past. Add this to my Recipe Box.

Hamburger Embellishments

Recreate a 1950s diner look decorating a cake to look like a staple of American restaurants -- the cheeseburger. Use three small layers of round cake, with one at least being chocolate to represent a beef patty, cover the top and bottom layers with light brown buttercream icing. Place an unfrosted chocolate layer in the center and use cutouts of green, yellow and red fondant to represent lettuce, cheese and tomatoes. Wrap chocolate wafer sticks in a light yellow fondant to create the illusion of French fries.

Jukebox Design

Get colorful with a jukebox styled cake to contribute to a 1950s theme. Lay a sheet cake on a flat surface and trim the top with a sharp knife making the two top corners rounded into a jukebox shape. Cover the surface with brown fondant, and then use strips of bright pink and green to create neon light to surround the top of the jukebox cake. Pipe in details with an icing bag and buttercream frosting to mimic buttons and other intricate details.

Ice Cream Soda Cake

Print out an enlarged image of an ice cream soda in a tall, vintage-looking glass. Trace over the outline of the image on tracing paper. Cut the image out of the tracing paper and place it on top of a sheet cake. Carefully cut the cake around the outline of the tracing paper with a sharp knife to create the ice cream soda. Use a pale green icing to create the color of the glass, light brown or pink icing to mimic the color of the ice cream at the top of the glass and top with real whipped cream and a cherry to finish the cake.

Poodle Skirt Design

Nothing says it's a 1950s theme party like a poodle skirt. With a thin sheet of light blue or pink fondant, you can create a cake version of one. Loosely drape a thin sheet of colored fondant over a skirt-shaped cake. Pucker the fondant in a couple of areas to create the illusion of fabric folds of a skirt. Create a small poodle on the lower half of a skirt with black icing. Use a black licorice whip and dab buttercream icing on the back to adhere a loopy leash for the poodle on the cake.

Wednesday, May 15, 2013

Simple Cupcake Decorating Ideas

Cupcakes can make an easy-to-serve dessert for your next event. Unfortunately, the prevalence of cupcake specialty stores and cupcake cookbooks have upped the ante when it comes to cupcake design. If you can't afford to spend several hours decorating your cupcakes, you may worry that your dessert will fall flat. Simple designs can still look attractive, though. You can easily create cupcakes that look great without taking much time to add decorations. Add this to my Recipe Box.

Candy

A single piece of bulk candy on top of the cupcake adds extra sweetness as well as decoration. Match the candy to your theme or the type of frosting you use. A brightly colored gumdrop looks great against a background of white frosting. Use gummy fish with bright blue frosting for an instant undersea look. Put a peanut butter cup on top of a chocolate cupcake with peanut butter-flavored frosting.

Colored Sugar

Purchase colored sugar in the baking section of your grocery store. Choose a color that matches the theme of your event and contrasts with the frosting you've chosen. Any color can look good with white frosting, but you might want to choose green sugar for a yellow lemon-flavored frosting or purple sugar for a pink strawberry-flavored frosting. Simply shake the sugar on top of the cupcake. If you want to go a bit further, you can hold a stencil over the cupcake, which will only allow the sugar to fall in the shape you've chosen, such as a heart or flower.

Easy Animals

Using a frosting bag with different frosting tips, you can easily dot the cupcake with frosting that looks like fur. Once you've done that, use candies like jelly beans, string licorice and cookies to create the animal's face.

Cupcake Presentation

Rather than decorating individual cupcakes, think about your presentation as a whole as your decoration. For example, Disney's Family Fun website suggests frosting the cupcakes with brightly colored frosting, then attaching a string to each one and arranging them to look like a bunch of balloons. You can also use two different-colored frostings to create a design -- frost cupcakes in pink and lay them out in the shape of a heart, then use a different color to fill in the areas around the heart.

Chocolate Cupcake Ideas

Tired of the same old chocolate cupcakes? Have you ever thought about adding fruit such as cherries, raspberries or oranges to your cupcakes? Do you like the taste of java or espresso? There are an almost endless variety of chocolate cupcake ideas to keep things fresh and exciting at dessert time. Add this to my Recipe Box.

Fruit-Filled

Raspberry-filled cupcakes are made with a box of devil's food cake. Mix the cake by following the instructions on the box. Spoon it evenly into paper-lined muffin cups, filling each cup 1/2 full and bake until done. When cupcakes are cool, insert the end of a wooden spoon into the center and create a ½-inch deep well. Fill with raspberry jam. For topping, blend a cup of raspberries with ready-made white frosting, spread over cupcakes and garnish with fresh raspberries. For more fruit flavor options, add a can of pie cherries or 1/2-cup of orange juice to your batter.

Java Cupcakes

For making java or espresso cupcakes, follow the instructions on a box of chocolate cake mix, but substitute brewed coffee for the water needed. The coffee you use can be any variety. Spoon the batter into lined muffins cups, fill each cup half full and bake until done. For topping, mix ½ cup of coffee with ½ cup cold milk then add one package (four-serving size) vanilla instant pudding mix. Using a wire whisk beat about two minutes then fold in 8 oz. thawed, whipped topping and spread over cupcakes.

Holiday Decorations

You can make chocolate cupcakes for almost any holiday with cute decorations. Top the cupcakes with white frosting or you can add food dye to get the color of frosting to match the holiday. For Easter, mix green food color with coconut to create grass and sprinkle over the frosting on the cupcakes. Add bunny-shaped marshmallows and jelly beans. For Valentine's Day, add heart-shaped candy to the top the cupcakes. Decorate with bats, black cats and ghost-shaped candies for Halloween.

No-Bake

To make a chocolate cream cupcake, you will need ½ cup thawed whipped topping, 2 oz. of softened, cream cheese, 1 square of melted, semi-sweet chocolate and 1 tbsp. of powdered sugar. Mix them together until they are well blended. Layer two vanilla wafers in the bottom of medium muffin cups lined with two paper cups and cover with 1 tbsp. of whipped mixture. Repeat wafers layers and top evenly with whipped mixture. Place in the refrigerator for at least one hour before serving.

How to Make Tie Dyed Frosting

If you're having a 1960s-themed party, colorful tie-dyed confections are the perfect addition to the dessert table. Let kids help make tie-dyed sweets for a fun family dessert-making experience. Grab some gel colors that match your party theme, and get ready for some groovy desserts. Add this to my Recipe Box.

Allow your cake or cupcakes to cool completely before frosting.

Frost the cake or cupcakes with plain white, yellow or other light colored frosting of your choice.

Add the tie-dye effect to the frosting by first making circles on the cake or cupcakes using the squirtable gel frosting. Start in the center with a small circle, then make concentric circles all the way to the edges of the cake. The gel circles should be about 1/4 inch apart. The cake will look similar to a bullseye pattern.

Drag a toothpick starting from the center circle all the way to the outer circle. This will create a design in the circles as you pull it through. For a large cake, you may want to use a dull knife to drag through the gel to cover more ground. A toothpick will work for cupcakes. Do this going all around the cake or cupcakes. This gives the appearance of tie-dyed frosting.

How to Fill a Cupcake With Jam

If you are the baker of the family, you likely have a perfect cupcake recipe that your friends and family love. However, if you want to expand on your cupcake culinary skills, a cupcake filled with a favorite jam will surprise and impress your guests. Filling cupcakes may seem like a complicated task, but it's a rather simple process that only requires a pastry bag and tip, and the jam of your choice. Add this to my Recipe Box.

Bake your favorite cupcakes according to the recipe and allow them to cool for 5 to 10 minutes.

Place the jam of your choice in a microwave-safe dish and microwave for 15 seconds to soften.

Fit a metal or plastic tip with a medium opening over a pastry bag and fill the bag with the jam.

Insert the tip of the pastry bag directly into the center of the cupcake halfway through. Do not go any farther or the jam will leak from the bottom of the cupcake.

Gently and slowly squeeze the bag to release jam into the cupcake until the jam fills up to the top of the hole you punctured into it. Repeat with the rest of the cupcakes.

Frost the tops of the cupcakes to decorate and hide the jam-filled hole.

Tips

- You can also use a cupcake corer. This tool cuts a small hole out of the center of the cupcake for you to fill.

Tuesday, May 14, 2013

How to Change the Color of Your Cake Batter

Cakes are yummy treats that many people reserve for celebrations, but cake batter is typically anything but exciting. They can be colorful, though. Instead of opting for a cherry-flavored batter to have a pink cake or a "confetti" batter to have specks of color, for example, try changing the color of your cake batter. With simple food coloring, you can transform ordinary cake batter to any color of your choice, or dye different portions to render a rainbow cake. Add this to my Recipe Box.

Mix your cake batter according to the directions on the box or in your cookbook.

Add one teaspoon gel food coloring at a time until you get the color you want. Gel coloring is much bolder than liquid coloring, so not a lot is needed to change the batter to a bright color. Blend into the batter with a spoon until well incorporated.

Scrape the batter into your cake pans with a spatula.

Bake as directed.

Tips

- For best results, only use light-colored cake batters. Because gel food coloring is concentrated, basic color mixing rules (i.e. yellow + blue = green) do not apply. For example, do not add blue gel food coloring to a yellow cake mix to turn the batter green. Instead, simply add green gel food color to yellow batter to render a green-colored cake.

- Another reason to use gel food coloring: Liquid food coloring has a great deal of water in it, so not only will you need a lot of it to color your cake, but the excess water can ruin the consistency of the batter.

Preschool Cooking Ideas

Cooking with preschoolers can be both fun and educational. The educational part comes into play when teaching them how to measure different ingredients and safety in the kitchen. Cooking with children also opens the avenue of introducing new foods, healthy alternatives and healthy eating. Cooking with preschoolers can also be messy, but you can teach them the importance of keeping a clean work space and kitchen by having them clean up as you go along or when you are finished. Add this to my Recipe Box.

Pizzas

Pizza is one of the foods most preschoolers love. Have them make their own individual pizzas -- either making your own dough or using pre-made dough -- by teaching them to roll out the dough. Let them create fun shapes with the dough or make traditional circles, then spoon on and spread the sauce. Shredding cheese is another step they can help with. Allow them to add a selection of toppings to their pizzas, creating smiley faces, shapes or the first letter of their name. Encourage them to try at least one new food in their topping choices. Putting them in the oven and removing them is probably better left to an adult.

Cupcakes

Cupcakes are a good teaching lesson for preschoolers. Because they require several different ingredients, it helps to teach about measuring and following a recipe. Have each child help in mixing the ingredients, then use a round ice cream scoop to transfer the batter to the cupcake holders. Make the frosting while the cupcakes bake and add food coloring to make unique frosting colors. Let the children frost and decorate their own cupcakes. Use a variety of toppings such as sprinkles, chocolate candy pieces, jelly beans and fresh pieces of fruit.

Chicken Fingers

Kids will have a blast pounding chicken cutlets to tenderize and flatten them. Because chicken requires special handling, it is best for an adult to do all parts that require touching the chicken. Place one chicken breast in a plastic zipper bag for each child. Show them how to gently pound the chicken with a tenderizing mallet or roll with a rolling pin. Cut the chicken into long strips and using tongs or a fork, dip in a slightly beaten egg, then roll in bread crumbs and place on a cookie sheet. Bake in the oven until no longer pink inside. Serve with homemade dipping sauces.

Scrambled Eggs

Scrambled eggs are easy enough for preschoolers to make with some help and supervision. Help them crack eggs, and let them scramble them in the bowl using a whisk. Add ingredients such as shredded cheese, peppers or diced potatoes. Show them how to spray a frying pan with non-stick cooking spray and pour the egg mixture into the heated pan. Help them cook the eggs until they are done. Teach them how to use a toaster to make toast to accompany the eggs.

What Tips Should I Use to Pipe a Cupcake Bouquet?

Cupcake bouquets are an edible treat that may be used for a party centerpiece, gift or birthday cake. The small cakes are decorated with full-size frosting flower blossoms or a mass of tiny petals. The flowery cupcakes are assembled into a sweet bouquet when mounted on sticks or skewers arranged in floral foam or a wide-mouth vase. Use cake decorating tips to pipe and create the petals and flowers for the cupcake bouquet. Add this to my Recipe Box.

Petal Tips

Petal tips are used to create a full frosting flower on top of a cupcake. Tip numbers 59 to 127 create rounded ends and ruffled petals. Roses, ruffled chrysanthemum, marigold and pansy blossoms can be designed with petal tips. The specialty 127D tip makes a giant rose for a display made from large cupcakes. The 97 tip is ideal for Victorian style rose blossoms. Petals are piped individually or in a continuous motion.

Drop Flowers

Small tips numbered from 106 to 225 and medium 131 to 194 are used to pipe a mass of miniature blossoms onto a frosted cupcake. Pink, blue, lavender and yellow drop flowers can be combined in various sizes for a cupcake bouquet. Special drop flower tips are also manufactured for left-handed cake decorators. They are identified with the letter L and the tip number.

Open and Closed Star Tips

The open star shapes range from the tiny number 13 to the over-size 8B. Closed star shapes have deeper grooves with lines spreading from the center of the blossom outward. The star and miniature rounded petal blossoms are perfect to fill in the top and sides of a cupcake flower. The blossoms create an effect of a mass of forget-me-not or lilac-shaped flowers.

Leaf Tips

Leaf tips are made for plump, jagged or thin leaves. The thin leaf tips including the number 74 and 75 are the best shape for making long petals. Create daisies, asters and chrysanthemums with these tips. The rounded leaves that end in a point are formed using the number 112, 113 and 115 tip. This shape is used to form the red and green poinsettia leaves for a Christmas cupcake bouquet.

Round tips

The smallest round tips, such as the number 8, 10 and 230, can be used to pipe long, plump tips for a Gerber daisy. The petals are formed on a piece of parchment paper and assembled on the frosted cupcake after drying.

How to Make Flavored Cupcakes

When choosing a cupcake flavor, the basic two flavors usually come to mind first: chocolate or vanilla. Just turn on your favorite baking show or step into any bakery and you'll find more than just the basics. With hundreds of scrumptious choices, and endless flavor options, you'll be tempted to try whipping up your own creative concoctions. Add this to my Recipe Box.

Select a flavor for your cupcakes. Some flavors, such as carrot, will involve adding ingredients to the cupcake mix before baking. Other flavors, such as marshmallow, involve filling the already baked cupcakes. Search online or look in recipe books and magazines for ideas on what flavorings to use for your cupcakes. In his article "Cupcakes for Grownups," Greg Patent offers a variety of cupcake flavor options including ginger, mocha chip and caramel. Good Housekeeping's website provides a plethora of cupcake recipes including strawberry shortcake, cherry and pumpkin spice.

Buy the necessary ingredients to make your cupcakes. If choosing to make your cupcakes from scratch, find a recipe to follow. Martha Stewart's website features a basic cupcake recipe which can be a base for many flavorings including peanut butter, coconut, and chocolate chip. To save time, buy a white or vanilla cake mix from the store. If you plan to flavor the cupcakes by filling them, you may wish to make chocolate-flavored cupcakes.

Preheat the oven to the temperature listed in your recipe or on your prepackaged mix (typically 350 degrees). Select a muffin tin and grease it with nonstick cooking spray or line with paper liners. Prepare the cupcake batter by following the directions on the prepackaged mix or the recipe.

Add flavorings to the cupcake batter by following the recipe's directions. Once the desired flavor has been added, bake cupcakes according to the recipe or the packaged. After cupcakes are baked, cool them in the pan for 5 to 10 minutes, then remove them. Cool completely on a rack.

Frost cupcakes if you desire or you fill the cupcakes with a variety of fillings. Use a large round tipped pastry bag to fill baked cupcakes. Spoon the desired filling into the pastry bag and squeeze the filling into the center of the cupcakes. Popular fillings include lemon, melted chocolate, jelly, and marshmallow. After filling cupcakes, you may then frost them if desired.

How to Fill a Cupcake With Cream

Cream-filled cupcakes seem fancy but are rather easy to put together. The key is to get the cream in through the very bottom or very top, where the marks from the work won't be visible to those eating the cupcakes. The pastry bag method can be used for any creamy filling, including puddings or icings. The cone method can be used for any filling such as fruits or jams. Add this to my Recipe Box.

Pastry Bag Method

Lay warm, fresh cupcakes upside down on a piece of wax paper. Prepare your disposable pastry bag by filling it 1/4 full with the cream filling and fitting on a small round pastry tip.

Stick the end of the pastry tip through the bottom of each cupcake. Press gently to fill the interior pocket with the cream filling, being careful not to overfill.

Sit cupcakes right side up, handling them carefully. Ice or decorate the cupcakes as you desire. Store them in the refrigerator until you're ready to serve.

Cone Method

Sit warm, fresh cupcakes out on a clean counter. Use a paring knife to cut a small cone shape from the center of the top of each cupcake, with the point of the cone reaching toward the middle of the interior.

Spoon cream mixture into the cone-shaped holes. Cut the pointed end of the cupcake cone piece off and place the top back on the cupcake to cover the hole.

Ice the cupcake to hide the marks from the hole. Store in a refrigerator until ready to serve.

Alien Cake Ideas

The good thing about baking an alien cake is that you get a lot of creative license to make the cake look however you want. Green tentacles, bulging eyes and other creepy features are likely to enter your mind when you think about aliens, so get creative and use those in your cake design. Add this to my Recipe Box.

Alien Head Cake

Make a cake that is shaped like an alien head. Aliens depicted in books and movies commonly have heads that are wide at the top and come to a point at the chin. Use a round cake to create the alien head. After the cake has baked and cooled, use a serrated knife to shape it into a point at the chin. Frost the cake with green icing, and use black frosting to create large, oblong eyes on the cake. If you want the cake to look extra creepy, place gummy worms on the cake to make it look like they are coming out of the alien's head.

Eyes

When bulging eyes come to mind when you think about aliens, use that as an inspiration for your cake. Bake a cake in the size and shape of your choice, and frost it in a color that coordinates with the rest of your party decor. Go to a local candy shop, and look for candies that look like eyeballs. If you can find different shapes and sizes, use those. Place the eyeballs all over the cake so that it looks like alien eyes are covering the cake.

Alien Body

Consider making a cake that looks like an alien's body. Use two square cakes to create the alien's body. Cut one of the square cakes into a triangular shape and place it onto the cake platter as the alien's head. Place the second square cake just below the head to serve as the alien's body. Frost the two sections with green frosting. Pipe alien features onto the cake, such as eyes and a mouth. Use licorice ropes to create the alien's legs and arms.

Cupcakes

When you don't want to make a large traditional cake, bake cupcakes instead. Bake your favorite cupcakes, and frost them in the color of your choice. Find candies or plastic figurines shaped like an alien. You can get them from your local party store or online. Place one candy or plastic alien on top of each cupcake.

Monday, May 13, 2013

How to Make Animal Cupcakes

Animal themed cupcakes can be used as a special treat for many different events. Use bunnies and chicks for Easter, turkeys for Thanksgiving or reindeer for Christmas. A farm or jungle themed birthday party can feature pigs, cows and sheep, or monkeys, elephants and tigers. These creature cupcakes are a decorative alternative to a single large cake, and provide ready-made servings for easy distribution. With an assortment of candies and icing colors you can create nearly any creature to match the theme of your event. Add this to my Recipe Box.

Bake an assortment of cupcakes in your favorite flavors. Use cupcake liners that coordinate with the body colors of the animals you will be creating. For example, use white for bunnies or lambs, pink for pigs and yellow for chicks.

Ice the tops of the cupcakes in the same color as the cupcake liners. The icing will serve as the surface of the animal's face.

Make animal faces on the tops of the cupcakes with candy pieces or by piping on icing or melted candy melts. Brown M&Ms make good eyes or small noses. Orange jelly beans make perky beaks for chicks. Use mini marshmallows to make protruding snouts. Two white mini marshmallows squished together form the upper lip of a dog or cat. Icing whiskers piped on top and a small brown or pink candy nose positioned just above the lip will complete the face. A pink mini marshmallow with two dots piped on for nostrils is ideal for a pig's face.

Stick additional candy shapes to the top of the face for ears. Shape gum paste or fondant pieces for large ears on creatures such as bunnies or dogs. Use pink jelly beans for small pig ears. Soften candy melts and reshape them to make the pointed ears of a cat.

Tips

- Position an assortment of animal cupcakes on a baking sheet sprinkled with coconut shavings colored with green food coloring to resemble grass.

Cupcake Decorating Ideas for Girls

When you're planning cupcake decorations, choose a theme popular with the age group of the girls who will be enjoying the cupcakes. If the girls are old enough to spread frosting and arrange toppings, you can set out all the supplies so they can make their own cupcakes. Otherwise, create a specific type of cupcake beforehand and display them during the party. Add this to my Recipe Box.

Flowers

If the girls are into flowers, decorate cupcakes with flowers. The simplest approach is to place a silk flower on top of each cupcake. For an edible topper, make flower-shaped sugar cookies, decorate them with colored icing, and place one on each cupcake. Make a flower directly on a cupcake by putting colored icing in a pastry bag with a leaf tip and creating petals radiating out from the center of the cupcake. Place a round candy, such as a nonpareil, in the middle to make the center of the flower.

Animals

Choose an animal that is popular with girls of that age and decorate cupcakes to look like that animal. Make cat cupcakes with fondant triangles for the ears, black candies as the eyes and nose, miniature marshmallows as the cheeks and black licorice whips as the whiskers. For ladybug cupcakes, use red frosting and small black candies as the dots. Place a round chocolate-dipped cookie on one end as the head and draw facial features with white icing.

Princess

Young girls often enjoy dressing up as princesses, so create princess cupcakes to serve at a themed party. One idea is to make cupcakes that look like crowns. Frost the cupcake with yellow icing and create strips of yellow fondant cut into the points of a crown to go around the circumference of each cupcake. Use dabs of icing to attach small candies that look like jewels to the tips of the crown and the center of the cupcake. Another method is to use peach-colored icing on the cupcake and brown and pink icing to add facial features of a princess. Stick small candies around the top of the cupcake to look like a crown on the princess.

Pink

Use the color pink, or another color if the birthday girl has a favorite, as the theme for cupcake decorations. Frost the cupcakes with pink icing made by mixing red food coloring into white icing. Top them with dark pink sprinkles, edible glitter and pink candies. If girls will be decorating their own cupcakes, provide pink frosting in a few shades and white frosting in pastry bags so girls can pipe decorative accents onto their cupcakes.